Configurazione RollGen RollGen Configuration
|
|
|
- Serafino Ruggeri
- 7 anni fa
- Visualizzazioni
Transcript

1 USO E MANUTENZIONE Istruzioni di montaggio USE AND MAINTENANE Instruction manual onfigurazione RollGen RollGen onfiguration RLG-ODE Avvolgitore per Gennaker / Spi asietrico Furling system for Gennakers/ Asyetric Spinnakers
2 INDIE GENERALE GENERAL INDEX I A INFORMAZIONI GENERALI...3 Introduzione...3 A-1 Simbologia presente nel manuale...4 A-2 Assistenza...4 A-3 Dati di identificazione...5 A-3.1 Modello e tipo...5 A-3.2 ostruttore...5 A-3.3 Targhetta di identificazione...5 A-4 Imballo e contenuto...6 A-5 Ricevimento del materiale...6 A-6 Descrizione dell apparecchiatura...7 A-7 Dati tecnici...8 A-7.1 Bozzello guidadrizza...10 A-8 Impieghi aessi...10 A-9 Uso improprio...10 B SIUREZZA...11 B-1 Indicazioni generali ISTRUZIONI DI MONTAGGIO e USO Operazioni preliminari Montaggio configurazione RLG = RollGen Determinazione della lunghezza dello strallo di RollGen onfigurazione RLG = RollGen Assemblaggio componenti Preparazione dello strallo al taglio Montaggio del morsetto inferiore Montaggio cima a circuito chiuso Verifiche e controllo RollGen assemblato Montaggio della vela Operazione di avvolgimento/svolgimento della vela Schema standard di montaggio onsigli per il corretto utilizzo di RollGen Utilizzo del circuito chiuso Altri consigli La corretta lunghezza del bordo d'entrata...34 D MANUTENZIONE...37 D-1 Manutenzione...37 D-2 Livelli di manutenzione...37 D-3 Prograa di manutenzione...38 D- 3.1 Pulizia e lavaggio...38 D- 3.2 Lunghi periodi di inutilizzo...38 D- 3.3 Verifiche visive...39 D- 3.4 Interventi di riparazione...39 GARANZIA...40 A GENERAL INFORMATION...3 Introduction...3 A-1 Symbols to be found in this manual...4 A-2 After-sales service...4 A-3 Identification data...5 A-3.1 Model and type...5 A-3.2 Manufacturer...5 A-3.3 Identification plate...5 A-4 Packaging and content...6 A-5 Receipt of goods...6 A-6 Description of the equipment...7 A-7 Technical data...8 A-7.1 Halyard swinging block...10 A-8 Proper use...10 A-9 Wrong use...10 B SAFETY B-1 General indications INSTALLATION and USE Preliminary operations Installation of RLG = RollGen configuration How to determine the length of RollGen stay RLG= RollGen configuration How to assemble components How to prepare the stay for cutting How to assemble the lower clamp How to assemble the endless line What to check when RollGen is installed Sail connection How to furl / unfurl the sail Standard installation scheme How to correctly use RollGen How to use the endless line kit Other suggestions orrect luff length...34 D MAINTENANE...37 D-1 Maintenance...37 D-2 Maintenance levels...37 D-3 Maintenance prograe...38 D- 3.1 leaning and washing...38 D- 3.2 Long inactivity...38 D- 3.3 Visual check...39 D- 3.4 Repair...39 WARRANTY um_rlg-code_rollgen_it-en_rev. 2.0
3 A INFORMAZIONI GENERALI GENERAL INFORMATION Introduzione Introduction Questo manuale è stato realizzato allo scopo di fornire tutte le informazioni necessarie per installare ed utilizzare l apparecchiatura in maniera corretta e sicura e per effettuarne la manutenzione. Occorre leggere e capire questo manuale prima di usare l apparecchiatura, ed effettuare qualsiasi operazione con esso o su di esso. Il manuale è suddiviso in sezioni, capitoli e paragrafi in modo da presentare le informazioni strutturate in modo chiaro. Le pagine sono numerate progressivamente. La ricerca delle informazioni può essere basata sull utilizzo delle parole chiave usate come titolo delle sezioni e dei capitoli ma soprattutto dalla consultazione dell indice generale. onservare questo manuale anche dopo la completa lettura, in modo che sia sempre a portata di mano per il chiarimento di eventuali dubbi. In caso di problemi nella comprensione di questo manuale o di parti di esso si raccomanda vivamente di contattare la ditta Soluzioni Meccaniche srl: indirizzi, numeri di telefono e telefax sono riportati nella quarta di copertina di questo manuale. This manual has been realised in order to supply all required information for a correct and safe installation, use and maintenance of the equipment. You have to read and understand this manual before using the equipment and carrying out any operation on it. This manual has been divided into sections, chapters and paragraphs in order to present the information in a structured and clear way. Pages are numbered progressively. The search for information may be done either through the key words used as titles for the sections, or through the consultation of the general index. Keep this manual at hand even after having read it, it may help clarify any doubt. Should you have problems in understanding this manual or parts of it, we strongly recoend contacting Soluzioni Meccaniche srl: address, phone and fax number can be found on the cover. La ditta Soluzioni Meccaniche srl declina ogni responsabilità per danni a persone o cose derivanti da un uso improprio dell attrezzatura, da imperizia, imprudenza o negligenza e dalla inosservanza delle norme descritte in questo manuale. Soluzioni Meccaniche srl declines any and every responsibility for damages to persons or things caused by either an improper use of the system or inexperience, negligence, imprudence, or noncompliance with this manual. opyright Soluzioni Meccaniche srl Tutti i diritti riservati Stampato in Italia Realizzazione: Soluzioni Meccaniche srl - Forlì Questo manuale o parti di esso non possono essere riprodotti, copiati o divulgati con qualsiasi mezzo senza la preventiva autorizzazione scritta della ditta Soluzioni Meccaniche srl. La ditta Soluzioni Meccaniche srl si riserva il diritto di apportare in qualsiasi momento tutte le modifiche che riterrà opportune, nella costante ricerca di migliorare la qualità e la sicurezza delle attrezzature, senza impegnarsi ad aggiornare di volta in volta questa pubblicazione. um_rlg-code_rollgen_it-en_rev. 2.0 opyright Soluzioni Meccaniche srl All rights reserved Printed in Italy Realization: Soluzioni Meccaniche srl - Forlì No part of this manual may be reproduced, copied or transmitted in any form, or by any means without permission in writing from Soluzioni Meccaniche srl. Soluzioni Meccaniche srl has the right to make any changes they think necessary in order to improve the quality and safety of the systems, without being obliged to revise this publication every time. 3
4 INFORMAZIONI GENERALI GENERAL INFORMATION A A-1 Simbologia presente nel manuale In questo manuale sono utilizzati cinque tipi di simboli grafici di sicurezza, che hanno lo scopo di evidenziare altrettanti livelli di pericolo o informazione: A-1 Symbols to be found in this manual This manual uses five types of graphic safety symbols, which highlight as many danger or information levels. PERIOLO Richiama l attenzione a situazioni o problemi che potrebbero pregiudicare l incolumità delle persone per infortuni o rischio di morte. DANGER Draws one s attention to situations or problems that might endanger the safety of persons, causing the risk of accident and death. PERIOLO DI FOLGORAZIONE Richiama l attenzione ad una situazione di grave pericolo che potrebbe pregiudicare l incolumità delle persone esposte fino a possibili rischi di morte dovuti alla presenza di tensione. DANGER OF ELETROUTION Draws one s attention to a highly dangerous situation that could endanger the safety and life of exposed persons due to the presence of electricity. ATTENZIONE Richiama l attenzione a situazioni o problemi connessi con l efficienza della macchina che non pregiudicano la sicurezza delle persone. AUTION Draws one s attention to situations or problems linked to the system s efficiency which do not endanger the safety of people. AVVERTENZA Richiama l attenzione a importanti informazioni di carattere generale che non pregiudicano né la sicurezza personale, né il buon funzionamento della macchina. WARNING Draws one s attention to important general information that endangers neither personal safety nor the operation of the system. RISPETTA L'AMBIENTE Per attirare l attenzione verso importanti informazioni per il rispetto dell ambiente. RESPET THE ENVIRONMENT Draws one s attention to important pieces of information concerning respect for the environment. A-2 Assistenza Qualora ci siano dubbi sull utilizzo o la manutenzione dell apparecchiatura, consigliamo di contattare la ditta Soluzioni Meccaniche srl. A-2 After-sales service Should you have any doubt concerning either the use or maintenance of the equipment, we suggest contacting Soluzioni Meccaniche srl. PERIOLO Nessuna modifica deve essere apportata all apparecchiatura senza l autorizzazione di Soluzioni Meccaniche srl, in quanto può comportare pericoli. DANGER The equipment cannot be modified in any way without the prior authorization from Soluzioni Meccaniche srl, as this may be dangerous. 4 um_rlg-code_rollgen_it-en_rev. 2.0
5 A INFORMAZIONI GENERALI GENERAL INFORMATION A-3 Dati di identificazione Verificare che il manuale sia corrispondente alla macchina a cui si fa riferimento. Nel caso di richieste di informazione o di assistenza tecnica, è necessario specificare, oltre al modello e tipo di apparecchiatura, anche il numero di matricola rilevabile dalla targhetta di identificazione posta su ogni apparecchiatura. A-3 Identification data Please check the instruction manual corresponds to the equipment we are referring to. Should you need further information or technical assistance, you have to specify not only model and type of equipment, but also the serial number that you may find on the identification plate placed on every device. A-3.1 Modello e tipo Avvolgitore manuale tipo RLG-ODE: A-3.1 Model and type Manual furler type RLG-ODE: A-3.2 ostruttore Soluzioni Meccaniche srl Via F.lli Lumière FORLI - ITALY Tel Fax info@bamar.it A-3.2 Manufacturer Soluzioni Meccaniche srl Via F.lli Lumière FORLI - ITALY Tel Fax info@bamar.it A-3.3 Targhetta di identificazione La targhetta di identificazione realizzata in alluminio adesivo con fondo argento viene applicata direttamente sull apparecchiatura. In essa sono riportati i dati identificativi dell apparecchiatura e del costruttore: A. Nome del costruttore B. Dati costruttore. Marchio E di conformità (ove presente) D. Tipo di apparecchiatura E. Modello F. Anno di costruzione G. odice A-3.3 Identification plate The identification plate is made in adhesive aluminium with silver background. It is fitted directly onto the equipment. The plate presents the identification data of both equipment and manufacturer: A. Name of manufacturer B. Manufacturer data. E conformity mark (where required) D. Type of equipment E. Model F. Year of production G. ode A B Via F.lli Lumière Forlì - ITALIA Tel Fax info@bamar.it d Mod. Anno odice e F G um_rlg-code_rollgen_it-en_rev
: A - n.")


6 INFORMAZIONI GENERALI GENERAL INFORMATION A A-4 IMBALLO E ONTENUTO RollGen e accessori vengono forniti in due kit separati per facilitarne trasporto ed iagazzinamento. I kit sono forniti, completi degli accessori per il montaggio, in una robusta scatola di cartone, di peso e dimensioni variabili in funzione del modello richiesto RLG-ODE (Kit): A - n.1 Manuale uso e manutenzione B - n.1 Testa girevole - n.1 Tamburo con mura folle D - n.2 Grilli a lira con asse manuale HR Ø 08 mod. 08 / Ø 10 mod. 10 / Ø 12 mod. 20 RLG-ODE (Kit strallo): E - n.1 Strallo con guaina e redancia superiore F - n.1 Morsetto inferiore G - n.1 avetto tessile punto di mura h - n.1 Frena fi letti + chiavi a brugola da 4 e 5 + cutter e nastro adesivo per taglio cima. Optional: I - ima circuito chiuso (con bozzello, paranchino tesacima, fettuccia attacco paranchino) J - Moschettone a sgancio rapido A-4 pakaging AND ONTENT RollGen and its accessories are supplied in two separate kits in order to make shipment and storage easy. The kits are supplied, along with accessories required for installation, in strong card board boxes, varying in weight and size according to the model requested. RLG-ODE (kit): A - n.1 Use and Maintenance manual B - n.1 Halyard swivel - n.1 Drum with tack swivel D - n.2 HR captive pin bow shackles Ø 08 mod.08 / Ø 10 mod.10 / Ø 12 mod. 20 RLG-ODE (Stay kit): E - n.1 stay with gaiter and upper thimble F - n.1 Lower clamp G - n.1 Textile tack rod h - n.1 Sealing liquid 4 and 5 allen keys + cutter and tape to cut the textile stay. Optional: I - Endless line kit (complete with block, tackle, tackle connection strop) J - Snap shackle G E F I D D A h B J A-5 RIEVIMENTO DEL MATERIALE Dimensioni e peso dell'imballo A-5 REEIpT OF GOODS packaging dimensions and weight AVVERTENZA Le dimensioni ed il peso dell imballo cambiano a seconda del contenuto della scatola. La merce viaggia a rischio e pericolo del destinatario. Egli ha il dovere di eseguire una completa verifi ca di quanto ricevuto, emettere tutte le riserve, se necessario esercitare tutti i ricorsi al trasportatore nei termini e nei modi regolamentari. WARNING Packaging weight and dimensions vary depending on box content. The goods are shipped at the receiver s own risk. The purchaser will have to check the goods carefully and should claim from the carrier in the due terms. 6 um_rlg-code_rollgen_it-en_rev. 2.0
7 A INFORMAZIONI GENERALI GENERAL INFORMATION A-6 Descrizione dell apparecchiatura RollGen RollGen è il rivoluzionario sistema per avvolgere tutti i comuni tipi di vela asietriche (spinnaker asietrico, gennaker, mps). Le vele utilizzabili con lo "strallo speciale RollGen" sono standard, non sono inferite o cucite allo strallo. La vela non necessita di modifiche, non deve essere disegnata e costruita appositamente per RollGen. RollGen non modifica l'efficienza propulsiva originale della vela. È possibile utilizzare il medesimo tamburo e la medesima testa per avvolgere vele inferite come ode 0 / Drifter. A-6 Description of the equipment RollGen RollGen is a revolutionary system to furl all coon types of asyetric sails (asyetric spinnaker, gennaker, MPS). The sails which can be used with RollGen are standard, not to be hoisted or sewn to the stay. The sail does not need to be modified, nor does it need to be designed or built specifically for RollGen. The use of RollGen does not change the original propulsive efficiency of the sail. You may use the same drum and halyard swivel in order to furl sails such as ode 0 and Drifter, with stay integrated in the luff. ROLLGEN = RLG ODE Legatura di penna Sail head lash Attacco drizza Halyard connection Guaina Gaiter Testa girevole Halyard swivel Bozzello 2:1 (optional) 2:1 block (optional) Perno rapido Quick release pin Strallo interno antitorsione Inner anti-torsion stay Morsetto inferiore Lower clamp Strallo originale vela (removibile) Sail original removable stay Attacco mura vela tessile Textile sail tack connection Avvolgitore Furler Avvolgitore Furler Perno rapido Quick release pin Attacco alla coperta o al bompresso onnection to deck or bowsprit um_rlg-code_rollgen_it-en_rev

8 INFORMAZIONI GENERALI GENERAL INFORMATION A A-7 Dati tecnici A-7 Technical data ø F E ø G I H B D Tamburo Drum Max carico lavoro Max working load kg A A B D E ø F ø G H I Peso Weight kg ima circuito Endless line ø odice ode x , x , x , ø T ø ø B ø A ø F Testa Halyard swivel R M Q LN NP ø S Bozzello Block RLG-ODE D E L ø ø M ø I G H Testa Halyard swivel Max carico lavoro Max working load kg N O P Q R ø S ø T Peso Weight kg odice ode , ,5 71,5 175, , , R , , , , Bozzello Block RLG-ODE Max carico lavoro Max working load kg ø A ø B ø D E ø F G H ø I L ø M Peso Weight kg odice , ,5 50 0, , ,5 61 0, , um_rlg-code_rollgen_it-en_rev. 2.0
9 A INFORMAZIONI GENERALI GENERAL INFORMATION Sistema completo RLG Lunghezza strallo Stay length m Superficie velica max indicativa Indicative max sail area mq Strallo Stay ø arico di lavoro Working load RLG kg peso strallo Stay weight kg/m odice ode 08 STD , STD , STD , A+B+ Kit cima completo omplete endless line kit B Bozzello a cricco Ratchet block Kit paranco tesacima Tackle kit Singoli componenti del kit circuito chiuso - Single components for endless line kit Descrizione - Description A B ima circuito RLG-ODE al metro (senza piombatura) RLG-ODE line per meter (not spliced) Bozzello a cricco (consigliato RLG-ODE ) Ratchet block (recoended for RLG-ODE ) Paranco circuito RLG-ODE RLG-ODE tackle odice - ode Moschettone fisso - Fixed snap shackle Modello Model arico di lavoro Working load T L peso Weight kg odice ode 08 1, , , , , , penzolo scotta - Sheet strop Ø Lunghezza BL Modello odice Length Model ode m kg , , , um_rlg-code_rollgen_it-en_rev

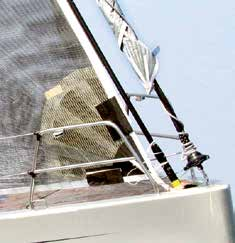
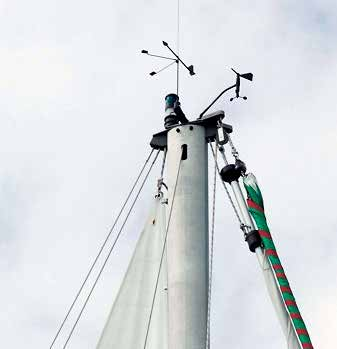
10 INFORMAZIONI GENERALI GENERAL INFORMATION A A-7.1 Bozzello guidadrizza A-7.1 halyard swinging block onsigliamo l utilizzo di un bozzello guida-drizza nel caso in cui ci si accerti che siano necessari adattamenti o modifi che all armo di bordo per un migliore utilizzo del sistema (es. innalzamento del punto di attacco dello strallo RLG in testa d albero se l uscita drizza spi si trova troppo vicina allo strallo di prua). We recoend using a halyard swinging block should you ascertain you need to modify and/or adapt the setting onboard in order to use the system at its best (e.g.: moving upward the RLG stay connection on top of the mast should the spinnaker halyard exit be too near to the forestay). odice: Bozzello guidadrizza piccolo max drizza ø10 Reference codes: Little halyard swinging block max halyard ø10 odice: Bozzello guidadrizza grande max drizza ø14 Reference codes: Big halyard swinging block max halyard ø14 A-8 IMpIEGhI AMMESSI RollGen è una specifica attrezzatura studiata per avvolgere vele asietriche come gennaker / spi asietrico / MPS. Qualsiasi altro impiego viene considerato contrario all'uso previsto e pertanto improprio. L'uso, la manutenzione e la riparazione di RollGen devono essere affi date esclusivamente a persone a conoscenza delle sue peculiarità e delle relative procedure di sicurezza. È inoltre necessario che siano rispettate tutte le norme antinfortunistiche e le norme generalmente riconosciute per la sicurezza e la medicina del lavoro. A-8 proper USE RollGen is a specifi c system designed to furl asyetric sails such as gennakers / asyetric spinnakers / MPS. Any other use will be considered as wrong and therefore improper. The use, maintenance and repair of RollGen must be entrusted exclusively to persons who are knowledgeable of both its characteristics and appropriate safety procedures. Moreover, all safety rules must be followed. A-9 USO IMpROpRIO Per uso improprio si intende l uso dell apparecchiatura secondo criteri di lavoro non conformi alle istruzioni contenute in questo manuale e che, comunque, risultassero pericolosi per sè e per gli altri. A-9 WRONG USE Wrong use indicates the use of the device following working criteria that do not correspond to the instructions presented in this manual and that might be dangerous for the operator himself and other people. 10 um_rlg-code_rollgen_it-en_rev. 2.0
11 B SIUREZZA SAFETY B-1 Indicazioni generali Questo capitolo riassume le indicazioni di sicurezza di carattere generale che saranno integrate, nei capitoli seguenti, da specifiche avvertenze ogni qualvolta dovesse risultare necessario. Nonostante l estrema semplicità delle operazioni di montaggio e la facilità nell uso dell attrezzatura, è opportuno che vengano rispettate alcune elementari norme di sicurezza. Queste norme garantiranno, oltre all incolumità fisica dell operatore, un corretto uso del prodotto ed una sua ottimale resa nel tempo. B-1 General indications This chapter suarises the general safety indications that will be integrated in the following chapters by specific tips when necessary. Though the system is very simple to assemble and use, some basic safety rules have to be followed. These rules will grant both the safety of the operator and the correct use of the product for its best preservation in time. Leggere attentamente e comprendere le istruzioni per l uso prima di procedere all installazione ed alla messa in funzione dell attrezzatura. L attrezzatura non deve in alcun modo essere utilizzato da bambini o per impieghi diversi da quelli specificati nel presente manuale. Tutti i lavori devono essere eseguiti indossando indumenti adeguati alle condizioni del lavoro stesso, ed ottemperanti alle norme vigenti nel paese nel quale tali lavori vengono eseguiti. Tenere questo manuale sempre a portata di mano e conservarlo con cura. Leggerlo attentamente per apprenderne le istruzioni relative sia al montaggio che all uso. Evitare che persone non a conoscenza delle necessarie informazioni possano intervenire sull attrezzatura. Eseguire le operazioni di montaggio e manutenzione in condizioni ottimali di visibilità ed in ambienti che, per clima e collocazione ergonomica del piano di lavoro, possano risultare idonei allo svolgimento di tutte le operazioni necessarie. Qualora gli interventi debbano necessariamente avvenire sull imbarcazione, effettuarli soltanto quando le condizioni climatiche possano garantire la massima sicurezza. Non eseguire l installazione in caso di forte vento o di temporali. Non eseguire mai alcun intervento (operativo o manutentivo) in presenza di persone che per età o condizione psicofisica non siano in grado di garantire il necessario buonsenso. arefully read and understand the instruction manual before installing and starting the equipment. The equipment must never be used by children, and must not be employed for uses that are not contemplated in this manual. All tasks have to be carried out wearing adequate clothes that abide the Laws in force in the ountry where the job is done. Always keep this manual handy. Read it carefully in order to learn the instructions for both installation and use. Do not allow people who do not have the necessary knowledge to use the system. arry out the installation and maintenance in optimal conditions of visibility and in areas that are suitable for all necessary operations both for climate and collocation of the plane of work. Should the interventions be inevitably executed onboard, carry them out only when the conditions can grant the highest safety. Do not carry out the installation in case of strong wind or rainstorm. Do not execute any intervention in presence of persons that for either age or psycho-physical conditions can not grant the necessary coon sense. um_rlg-code_rollgen_it-en_rev
12 ISTRUZIONI DI MONTAGGIO E USO -1 Operazioni preliminari Aprire gli imballi e verificare che la dotazione di materiali e minuterie sia completa. -1 Preliminary operations Open all boxes and check the list of materials is complete. RISPETTA L'AMBIENTE Provvedere allo smaltimento dell attrezzatura secondo le normative vigenti nei vari paesi. RESPET THE ENVIRONMENT Dispose of the equipment following the rules in force in the different countries. -2 Montaggio configurazione RLG = RollGen -2 Installation of RLG = RollGen configuration ATTENZIONE Evitare nel modo più assoluto di dare corso al montaggio senza avere a disposizione l'attrezzatura necessaria fornita. Il procedere con attrezzi di fortuna può, oltrechè danneggiare irreparabilmente il RollGen, risultare pericoloso per l'incolumità generale Determinazione della lunghezza dello strallo di RollGen La prima operazione da eseguire in fase di montaggio del RollGen è la determinazione della lunghezza dello strallo. Procedere come segue: Rilevare la distanza tra il golfare d attacco in coperta e/o bompresso e l uscita drizza. I rilievi devono essere effettuati utilizzando una cordella metrica metallica o inestensibile. Agganciare al moschettone di drizza lo zero della cordella. Issare la drizza sino ad arrivare in battuta a fine corsa sulla puleggia con il nodo/redancia. Rilevare la quota sino al golfare in coperta o bompresso tenendo la cordella ben tesa. Riportare la quota ottenuta nella colonna della tabella che trovate alla pagina seguente corrispondente al modello di RollGen in oggetto, completandola inoltre con i dati richiesti rilevati sulla barca per ottenere la lunghezza di taglio. AUTION Do not start assembling the system without the necessary tools. Proceeding with the wrong tools may not only irremediably damage the system, but can also be dangerous How to determine the length of RollGen stay The first step when assembling RollGen is to determine the length of the stay. Proceed as follows: Measure the distance between the connection eyebolt on deck and/or bowsprit and the halyard exit. Measurements should be taken using a metallic or inextensible metric measuring tape. Hook the zero of the tape onto the halyard snap shackle. Hoist the halyard up until it touches the pulley with its knot/thimble. Measure the distance to the eyebolt on deck or bowsprit, keeping the tape measure taut. Write down the measurement in the column corresponding to the appropriate RollGen model on the table on next page. omplete the table with the other data requested which may be measured onboard, in order to obtain the length of the cut. ATTENZIONE Segnare sullo strallo con il nastro in dotazione la posizione del taglio calcolata e, prima di effettuare il taglio fare un pre montaggio issando a bordo l'intero sistema per verificare di non avere coesso errori grossolani nel calcolo con il rischio di tagliare troppo corto lo strallo. Prima di effettuare il taglio dello strallo, verificare che non siano necessari all armo di bordo adattamenti o modifiche che potrebbero variare la quantità di taglio. Esempio: qualora l uscita della drizza spi coincida con l attacco dello strallo di prua, è possibile che la testa di RollGen e la penna della vela interferiscano con il vicino strallo di prua. È consigliato verificare la possibilità di spostare, alzandola, l uscita di drizza (vedi cap. A-9.1). onseguentemente varierà la lunghezza di taglio. AUTION With the tape supplied, mark on the stay the position where the cut has to be done as per your calculations. Before you cut the stay though, hoist the complete system onboard and check you have not made serious mistakes in your calculations, thus risking to cut the stay too short. Moreover, before you cut the stay, check you do not need to modify or change the setting onboard. In fact, any modification may determine a change in the length of the cut. E.g.: should the spinnaker halyard exit coincide with the forestay terminal, the RLG-ODE halyard swivel and the asyetric sail head may interfere with the near forestay. We therefore recoend checking the possibility of moving the halyard exit upward (please refer to hapt. A-9.1). onsequently the cut length will vary. 12 um_rlg-code_rollgen_it-en_rev. 2.0
13 ISTRUZIONI DI MONTAGGIO E USO A X L-RLG E E L-RLG quota rilevata con drizza in battuta (-2.1) L-RLG measurement with halyard touching the pulley on top of mast A tolleranza drizza libera in testa (detrarre) A tolerance free halyard on top (deduct) E ingombro tamburo + morsetto + grillo standard (detrarre) E drum dimensions + clamp + standard shackle (deduct) X X quota per taglio strallo da grillo su testa girevole di RollGen measurement for cutting the stay from bow shackle on RollGen halyard swivel = = = ATTENZIONE Qualora si utilizzi il moschettone a sgancio rapido opzionale, al posto del grillo a lira in dotazione, o si interponga una prolunga (non girevole) al di sotto del tamburo, riverificare la quota "E". um_rlg-code_rollgen_it-en_rev. 2.0 AUTION Should you either use the optional snap shackle to replace the bow shackle supplied, or insert a non-swivel extension below the drum, please check "E" measurement again. 13


14 ISTRUZIONI DI MONTAGGIO E USO -3 onfigurazione RLG = RollGen -3 RLG= RollGen configuration -3.1 Assemblaggio componenti Quota "0" -3.1 How to assemble components Il punto QUOTA "0" indicato in figura, indica il riferimento per il calcolo lunghezza strallo. The 0 quote shown in the picture, indicates the reference point to measure the stay. ollegare la redancia superiore dello strallo alla testa girevole come indicato nella figura a lato. onnect the stay upper thimble to the halyard swivel as shown in the photo beside. AVVERTENZA Verificare periodicamente il serraggio di tutti i perni. WARNING Periodically check that all shackle pins are tight. AVVERTENZA Si consiglia di utilizzare filo di acciaio o fascetta in plastica (non forniti) per legare il perno del grillo a lira come indicato in figura. WARNING We recoend using either steel cable or plastic clamps (not supplied) in order to tie the bow shackle as shown in the photo. 14 um_rlg-code_rollgen_it-en_rev. 2.0

 with the zero even with the upper shackle of the halyard swivel (assembled beforehand, please refer to.")
 individuata, al fine di scoprire lo strallo tessile sottostante facendo")
15 ISTRUZIONI DI MONTAGGIO E USO -3.2 Preparazione dello strallo al taglio -3.2 How to prepare the stay for cutting Per realizzare il taglio dello strallo, procedere come segue: Riportare la quota "X" ottenuta lungo lo strallo del RollGen tenendolo steso (es. lungo al pontile) con lo zero in corrispondenza del grillo superiore della testa girevole, precedentemente assemblata (.3-1). In order to cut the stay, proceed as follows: Mark the measure X, obtained on the RollGen stay, having laid it down (i.e. along the wharf) with the zero even with the upper shackle of the halyard swivel (assembled beforehand, please refer to.3-1). Segnare sullo strallo la linea di taglio (A) ed effettuare il taglio come descritto di seguito. A Mark the cutting line (A) on the stay and cut as follows. Taglio dello strallo Utilizzando il cutter in dotazione, tagliare la guaina circa 100 più corta rispetto la linea di taglio (A) individuata, al fine di scoprire lo strallo tessile sottostante facendo attenzione a non danneggiarlo (qualora la linea di taglio non capiti nel tratto di cima/strallo già scoperta dalla guaina). A 100 How to cut the stay Using the cutter provided, cut the rubber gaiter about 100 shorter than cutting line (A), in order to expose the inner stay, being careful to not damage it (this in case the cutting line were not in the cable/stay track that is not covered by the rubber gaiter). ATTENZIONE Riverificare la corretta posizione della linea di taglio (A) sullo strallo tessile, ripetendo la misurazione con la cordella metrica come indicato precendentemente. AUTION heck again the correct position of cutting line (A) on the stay, by repeating the measurement with the metric measuring tape, as indicated above. Utilizzando la fettuccia di nastro adesivo in dotazione, avvolgere lo strallo tessile con due giri al centro della linea (A) precedentemente individuata. A Using the tape supplied, wrap the textile stay twice in the middle of line (A) previously determined. um_rlg-code_rollgen_it-en_rev
 facendo attenzione a non danneggiare con il cutter lo")


16 ISTRUZIONI DI MONTAGGIO E USO Tagliare con il cutter in dotazione lo strallo tessile al centro del nastro adesivo. Using the cutter supplied, cut the stay in the middle of the tape. Dal taglio effettuato sullo strallo detrarre la sola guaina espansa della quota prevista per il modello in oggetto (quota "G", vedi tabella) facendo attenzione a non danneggiare con il cutter lo strallo sottostante.tale detrazione è necessaria a fare in modo che, quando lo strallo sara' in verticale la guaina NON APPOGGI sul morsetto inferiore. Quando lo strallo sara' in posizione di lavoro riverificare la quota "G" che potrebbe essersi ridotta causa il normale allungamento della guaina. "G" From the cut on the stay, deduct the amount of rubber gaiter prescribed for the appropriate model (measure G, see table) being careful not to damage the underlying stay with the cutter. Such deduction is required in order to prevent the gaiter from touching the lower clamp when the stay is put up. When the stay is in working position, please check again measure G, as it may shrink because of the normal stretch of the gaiter. ATTENZIONE La guaina deve poter girare liberamente rispetto allo strallo e deve potersi allungare verso il basso liberamente. AUTION The gaiter must be free both to rotate independently from the stay, and to stretch downward. AVVERTENZA Non rispettando la suddetta condizione lo strallo non lavorerà correttamente compromettendo l'avvolgimento corretto della vela. WARNING If you do not respect the abovementioned condition, the stay will not work properly, thus compromising the sail correct furling operation. G detrazione guaina G rubber gaiter deduction RLG 08 RLG 10 RLG um_rlg-code_rollgen_it-en_rev. 2.0
.")
 in dotazione aiutandosi, se necessario, con una prolunga.")
17 ISTRUZIONI DI MONTAGGIO E USO -3.3 Montaggio del morsetto inferiore Smontare le 6 viti (A) del morsetto ed i 2 grani pressastrallo a (B) facendo attenzione alla fuoriuscita delle relative sfere d (D). a Aprire il morsetto ed inserirvi all'interno lo strallo tagliato a misura sino in fondo cioè fino a quando l estremità non sarà visibile all interno dell apposito foro (). B Richiudere il morsetto e serrare uniformemente le 6 viti (A) applicando una goccia di frenafiletti (F). Stringere le viti f agendo in maniera sequenziale ed uniforme comprimendo lo strallo. Per realizzare il serraggio delle c viti utilizzare la chiave (G) in dotazione aiutandosi, se necessario, con una prolunga. Inserire le sfere (D) all interno dei due fori filettati centrali (E) quindi serrare con i relativi grani (B) anch essi con una goccia di frenafiletti (F), sino a che questi non siano ben seratti (circa sullo stesso piano del coperchio del morsetto) E B D How to assemble the lower clamp g Unscrew the 6 screws (A) and the 2 rope press grub screws (B), paying attention to prevent the ball (D) bearings from coming out. Open the clamp and insert the stay cut to measure until the end is visible inside the hole (). lose the clamp and uniformly screw in the 6 screws (A), applying a drop of sealing liquid (F). Tighten the screws sequentially and uniformly, squeezing the stay. To screw in the screws, use the key (G) supplied, helping out with an extension if necessary. Insert the ball bearings (D) into the two central threaded holes (E), then screw in their grub screws (B), also applying a drop of sealing liquid (F), until these are even with the cover surface of the clamp. ATTENZIONE Prima dell'utilizzo, riverificare il settaggio delle viti più volte stringendole in maniera sequenziale poichè lo strallo tessile si deve comprimere. AUTION Before use, check more than once the screws are well taut, by sequentially screwing them in, since the textile stay needs to be compressed. AVVERTENZA Verificare periodicamente il serraggio delle viti e dei grani del morsetto inferiore. WARNING Periodically check grub screws and screws on the lower clamp are tightly screwed in. um_rlg-code_rollgen_it-en_rev
 agendo sulla molla a sgancio")
 which is controlled through a spring")
18 ISTRUZIONI DI MONTAGGIO E USO -3.4 ollegamento al tamburo inferiore ollegare il morsetto inferiore al tamburo utilizzando il perno rapido (A) agendo sulla molla a sgancio (B). Per l'apertura e chiusura della molla a sgancio dei perni operare come descritto in figura. a APRI/OPEN b -3.4 onnection to the lower drum onnect the lower clamp to the drum, by using the quick release pin (A) which is controlled through a spring (B). In order to open and close the pin spring, operate as shown in the picture. HIUDI/LOSE 18 um_rlg-code_rollgen_it-en_rev. 2.0
 dell anello centrale (B) alla")
 of the central ring (B) at the base of the furling drum.")
 a circuito chiuso all interno della \"bocca\" guidacima (F)")


19 ISTRUZIONI DI MONTAGGIO E USO -3.5 Montaggio cima a circuito chiuso -3.5 How to assemble the endless line Svitare le viti di fermo (A) dell anello centrale (B) alla base del tamburo arrotolatore. Estrarre l anello ed il cestello (). A Unscrew the locking screws (A) of the central ring (B) at the base of the furling drum. Extract the ring and the basket (). B e f A Inserire la cima (D) a circuito chiuso all interno della "bocca" guidacima (F) facendo attenzione che la cima non presenti nodi accidentali e sia libera di poter compiere l intero giro del circuito chiuso senza impedimenti. e b B c Insert the endless line (D) into the line jaws (F), making sure the line has no accidental knots and is free to run the entire length of the endless circuit without impediments. D Inserire la cima (D) all interno della gola della puleggia (E). Insert the line (D) into the pulley race (E). E D f D um_rlg-code_rollgen_it-en_rev
 dell'anello (B) con una goccia di frenafiletti. Bring the central ring (B) back into position.screw in the four screws (A) of ring (B) with a drop of sealing liquid.")

 nell'occhio (G). Ø 08 mod. 08 Ø 10 mod.")
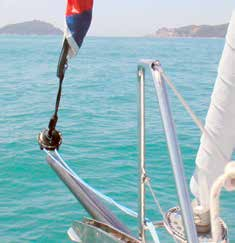
20 ISTRUZIONI DI MONTAGGIO E USO Accoppiare nuovamente il cestello () al tamburo. Reconnect the basket () to the drum. B Riportare in posizione l anello centrale (B). Serrare le quattro viti (A) dell'anello (B) con una goccia di frenafiletti. Bring the central ring (B) back into position.screw in the four screws (A) of ring (B) with a drop of sealing liquid. A g Nel serrare le viti (A), posizionare l'occhio (G) del tamburo facendo in modo che, una volta montato il tamburo sul golfare del bompresso, la "bocca" d'uscita della cima a circuito chiuso sia correttamente orientata nella direzione di tiro. Bompresso Bompresso When screwing in screws (A), place the eye (G) of the drum in a direction which allows for the jaws where the endless line comes out from to be correctly oriented in the pulling direction once RollGen is connected to the bowsprit eyebolt. Montare il grillo "a lira" in dotazione (o il moschettone fisso a sgancio rapido optional) nell'occhio (G). Ø 08 mod. 08 Ø 10 mod. 10 Ø 12 mod. 20 SI / YES NO / NO Fit the bow shackle supplied (or the optional fixed snap shackle) onto the eye (G). Ø 08 mod. 08 Ø 10 mod. 10 Ø 12 mod. 20 Moschettone fisso a sgancio rapido: Mod. RLG 08 - cod Mod. RLG 10 - cod Mod. RLG 20 - cod Fixed snap shackle: Mod. RLG 08 - code Mod. RLG 10 - code Mod. RLG 20 - code um_rlg-code_rollgen_it-en_rev. 2.0


21 ISTRUZIONI DI MONTAGGIO E USO -3.6 Verifiche e controllo RollGen assemblato -3.6 What to check when RollGen is installed Prima del montaggio della vela, issare RollGen per verificare la correttezza delle misure e del montaggio effettuato. Before fitting the sail, you have to hoist RollGen in order to check that both measures and installation are correct. Drizza libera Free halyard -3.7 Montaggio della vela -3.7 Sail connection Legare l'attacco di penna con il tessile di Dyneema in dotazione come indicato nelle foto. Tie the sail head with the Dyneema textile line supplied as shown in the pictures. Step 1: 4 giri - 4 loops Step 2: 4 nodi - 4 knots Step 3: nodo di sicurezza - safety knot Step 4: taglio cima in eccesso cut exceeding line Step 5 um_rlg-code_rollgen_it-en_rev
 by passing it inside the tack rod ring forming a loop (B).")
 as shown in the picture. Please refer to chapter -3.4 for the use of the spring (D) release.")

22 ISTRUZIONI DI MONTAGGIO E USO ollegare l angolo di mura della vela all estremità del cavetto tessile di mura (A) passandolo all'interno dell'anello di mura a "bocca di lupo" (B). b a onnect the sail textile tack onto the extremity of the textile tack rod (A) by passing it inside the tack rod ring forming a loop (B). Montare il braccetto del punto di mura: utilizzare il perno rapido () come indicato in figura. Agire sulla molla a sgancio (D) come indicato al punto Fit the textile tack rod onto the drum: use the quick release pin () as shown in the picture. Please refer to chapter -3.4 for the use of the spring (D) release. Murare il tamburo di RollGen con il grillo in dotazione o con il moschettone opzionale all estremità del bompresso o in coperta. D onnect the RollGen drum either onto the end of the bowsprit or on deck using either the shackle supplied or a fixed snap shackle. ATTENZIONE Se si interpone un accessorio tra il grillo alla base del tamburo e il golfare di prua, verificare la lunghezza complessiva dello strallo (vedi tabella cap. -2.1) e comunque verificare che con lo strallo teso rimanga sempre la quantità di drizza libera (A) prescritta (vedi cap. -2.1). AUTION If an accessory is placed between the shackle at the base of the drum and the eyebolt on deck, you have to check the total length of the stay (please refer to sheet on chapt -2.1), and in any case you need to verify that when the stay is stretched there always is the required quantity of free halyard (A) at the top (please refer to chapt -2.1). 22 um_rlg-code_rollgen_it-en_rev. 2.0
 on top of the halyard swivel and hoist the sail, stretching out the halyard/ stay.")


23 ISTRUZIONI DI MONTAGGIO E USO ollegare il moschettone di drizza al grillo superiore (E) della testa girevole ed issare la vela e lo strallo assieme tesando la drizza/strallo. E onnect the halyard snap shackle to the shackle fitted (E) on top of the halyard swivel and hoist the sail, stretching out the halyard/ stay. ATTENZIONE Prima della prima issata con la vela non ancora avvolta, preparare accuratamente la scotta della vela e la cima a circuito chiuso di arrotolamento. È possibile avvolgere la vela su RollGen anche a terra. Questo consente di effettuare la prima issata del sistema con maggiore sicurezza: AUTION Before you hoist the sail for the first time (not yet furled around the stay), carefully prepare sail sheet and endless furling line. You may furl the sail around the RollGen stay on the ground. This will allow you hoist the system for the first time with a higher safety. Tesare il sistema RollGen completo tra due punti fissi (es. due bitte in banchina). Tension the complete RLG system between two fixed points (e.g. two mooring bitts on the pontoon). Agendo sulla cima a circuito, avvolgere la vela avendo cura di verificare che la vela e l attrezzatura non si danneggino sfregando a terra. Furl in the sail by acting on the endless line, paying attention not to damage neither sail nor equipment by dragging them on the ground. ATTENZIONE In fase di issata verificare attentamente che la testa girevole non resti accidentalmente presa in parte dell'attrezzatura e che il tamburo ponendosi in posizione verticale non resti incastrato su accessori della prua (es. musone ancora). AUTION When hoisting, carefully check the halyard swivel does not get stuck in any equipment. Moreover, check the drum does not get caught in foredeck accessories (e.g. anchor) when straightening up. um_rlg-code_rollgen_it-en_rev

24 ISTRUZIONI DI MONTAGGIO E USO on le misure effettuate correttamente, una volta issato e tesato RollGen, il moschettone di drizza unito alla testa girevole dovrà sempre essere ad una distanza tale da consentire la tensione dello strallo senza che la drizza arrivi al suo fine corsa. Portare verso poppa la cima a circuito chiuso con il bozzello a cricco (F), tesandola con il relativo paranco (G) fissato ad un punto solido di bordo (es. la falchetta, una bitta, ecc.) utilizzando la fettuccia in dotazione. Qualora sia ritenuto necessario è possibile interporre uno o piu bozzelli apribili (non forniti in dotazione) sulla cima a circuito per ottimizzare il passaggio in coperta ed evitare attriti. F Minima distanza Minimum distance Min. 3/8 cm circa con drizza tesa Min. 3/8 cm with halyard stretched If measures have been taken correctly, once RollGen is hoisted and stretched, the halyard snap shackle joined to the halyard swivel should always remain at a distance allowing for the stay to be tensioned without the halyard getting to its stroke end. Stretch the endless line towards the stern of the boat; tension it by connecting the ratchet block (F) tackle (G) to a hard point (e.g. toe-rail or bitt) by means of the strop supplied. Should you deem it necessary, you may fit one or more snatch blocks (not supplied) along the endless line in order to optimize the passage on deck and avoid frictions. g 24 um_rlg-code_rollgen_it-en_rev. 2.0
, con la levetta di comando chiusa (H), permette la rotazione con")
, with the trigger closed (H), allows for ratchet rotation.")
25 ISTRUZIONI DI MONTAGGIO E USO -3.8 Operazione di avvolgimento/ svolgimento della vela -3.8 How to furl / unfurl the sail Avvolgimento: Agendo sulla cima a circuito chiuso tirare dal lato nel quale il bozzello a cricco (F), con la levetta di comando chiusa (H), permette la rotazione con cricco. Per avvolgere la vela agire sempre nello stesso senso di rotazione per mantenere la naturale precarica di torsione della cima/strallo. How to furl the sail: Operate the endless line, by pulling the side on which the ratchet block (F), with the trigger closed (H), allows for ratchet rotation. When furling the sail, always use the same direction of rotation, in order to maintain the cable/stay natural torsion pre-load. ATTENZIONE Non rispettando il senso di rotazione, lo strallo perderà la sua naturale precarica rendendo difficoltoso l'avvolgimento della vela. hiuso - Locked AUTION If you do not respect the direction of rotation, the stay will loose its natural pre-load, thus making the sail furling difficult. Svolgimento: f How to unfurl the sail: Posizionare la levetta (H) del bozzello a cricco (F) in posizione aperto quindi, agendo sulla scotta, svolgere la vela. Place the trigger (H) of ratchet block (F) in open position, and unfurl the sail by pulling the sheet Lo scopo del bozzello a cricco è esclusivamente quello di indicare all'operatore il giusto lato del circuito sul quale tirare pe riavvolgere la vela facendo ruotare il tamburo (e lo strallo) sempre nello stesso verso al fine di mantenere la precarica acquisita. h Aperto - Unlocked f The use of the ratchet block aims uniquely at indicating the operator which side of the endless line to pull in order to furl the sail in by rotating drum and stay always in the same direction, in order to maintain the pre-load acquired. ATTENZIONE Il bozzello a cricco non ha lo scopo di tenere chiusa la vela evitando al tamburo di ruotare. AUTION The ratchet block is NOT used to keep the sail closed by preventing the drum to rotate. h PERIOLO In fase di svolgimento della vela verificare che la cima a circuito chiuso sia libera di poter girare senza impedimenti. Non cercare di fermare la cima con le mani o con altro sino a quando la vela non è completamente srotolata. um_rlg-code_rollgen_it-en_rev. 2.0 DANGER When unfurling the sail, check the endless line cable is free to slide without impediments. DO NOT try and stop the line with your hands or by other means until the sail is completely unrolled. 25
 Asietrico Asyetric sail Bordo d'uscita (bal.")
26 ISTRUZIONI DI MONTAGGIO E USO -4 Schema standard di montaggio -4 Standard installation scheme Penna Top Luff Bordo d'entrata (inf.) Asietrico Asyetric sail Bordo d'uscita (bal.) Leech Bugna lew Punto di mura Tack Base Base Bompresso Bowsprit 26 um_rlg-code_rollgen_it-en_rev. 2.0


27 ISTRUZIONI DI MONTAGGIO E USO -5 onsigli per il corretto utilizzo di RollGen Per il corretto funzionamento di RollGen è necessario seguire alcuni semplici ma importanti accorgimenti: Si consiglia l utilizzo di un bompresso che, oltre a migliorare l efficienza propulsiva della vela asietrica, consente a RollGen di lavorare al di fuori del pulpito di prua, libero da possibili impedimenti consentendo allo strallo di RollGen di non interferire in fase di avvolgimento e svolgimento con lo strallo di prua. Prima di avvolgere la vela verificare la tensione della drizza. In fase di avvolgimento e svolgimento è fondamentale fare in modo che la drizza/strallo sia ben tesa. Verificare quindi, prima di riavvolgere la vela, la tensione che potrebbe essere calata a causa dell allungamento della drizza stessa. È possibile navigare con la vela avvolta compatibilmente con l'andatura e con le condizioni meteo. omunque è opportuno: Tensionare la drizza per diminuire le naturali oscillazioni dello strallo. Avvolgere con maggior cura la vela affinchè non vi siano parti che possano prendere vento. Arrotolare vari giri di scotta (o il penzolo, vedi cap. D-3) per tenere ben chiusa la vela. -5 How to correctly use RollGen In order to use RollGen properly you should follow a few simple but important directions: We advise using a bowsprit, which not only improves the sail propulsive efficiency, but it also allows RollGen to work outside the bow pulpit, free from possible impediments. Thus it prevents the RollGen stay from interfering with the forestay while furling and unfurling. Before furling the sail in, check the tension of the halyard. When furling and unfurling it is very important for the halyard/stay to be taut. Thus, before furling the sail in again, check the tension, as it may have decreased if the halyard has stretched. You may sail with the sail furled in, compatibly with weather conditions and course. Nonetheless, we recoend: Tensioning the halyard in order to reduce the natural movement of the stay. Furling in the sail with the outmost care in order to prevent parts of the sail from taking the wind. Wrapping the sheet (or the strop, please refer to hapter D-3) several times around the sail in order to keep it closed. The asyetric sail um_rlg-code_rollgen_it-en_rev

28 ISTRUZIONI DI MONTAGGIO E USO La vela asietrica installata su RollGen può essere utilizzata con una o due scotte. Nell utilizzo con due scotte prestare attenzione in fase di avvolgimento e svolgimento che la scotta lenta si avvolga e svolga correttamente recuperandola e filandola parallelamente alla scotta in uso. Per un utilizzo semplificato (es. crociera) si consiglia di utilizzare una sola scotta. Per effettuare la manovra di abbattuta, arrotolare la vela, passare la scotta davanti allo strallo di prua e, dopo aver abbattuto la randa, svolgere la vela asietrica sulle nuove mura. La rotazione impressa sul tamburo attraverso la cima a circuito chiuso viene trasmessa alla testa girevole attraverso lo speciale strallo anti torsione. È importante, in fase di avvolgimento, agire sempre nello stesso senso di rotazione utilizzando il cricco del bozzello in dotazione (come descritto al cap. -3.8) al fine di mantenere il naturale precarico della cima/strallo. Durante le prime operazioni di utilizzo di RollGen la cima/strallo dovrà acquisire il precarico che manterrà poi nelle operazioni successive girando il circuito sempre nello stesso senso di rotazione. Nei primi utilizzi di RollGen vi sarà un "naturale" ritardo di trasmissione della rotazione (rodaggio) sino a quando la cima/strallo non avrà acquisito la propria stabilità torsionale. Scotta in forza! Sheet in force! ontro scotta lenta! Slack counter sheet! Avvolgimento Furling direction hiuso - Locked installed on RollGen can be used with either one or two sheets. When using it with two sheets make sure that, when furling and unfurling, the sheet not in use furls and unfurls properly, gathering it up and unwinding it parallel to the sheet in use. For a simpler use (i.e. while cruising) we recoend using only one sheet. In order to gybe, furl the sail in, pass the sheet in front of the forestay and, after having gybed the mainsail, furl the asyetric sail on the new tacks. The rotation of the drum by means of the endless line is transmitted to the halyard swivel through the special anti-torsion stay. When furling, it is important to always roll the line in the same direction using the ratchet block supplied (as described on hapter -3.8) in order to maintain the stay natural pre-load. When first using RollGen, the stay/rope should acquire the pre-load that it will then maintain during successive use, by rotating the endless line always in the same direction. In fact, when you start using RollGen there will be a natural delay in transmitting the rotation (breaking in) until the stay/ rope will acquire its own torsional stability. 28 um_rlg-code_rollgen_it-en_rev. 2.0


29 ISTRUZIONI DI MONTAGGIO E USO -6 Utilizzo del circuito chiuso PARANO TESAIMA Non eccedere con la tensione del paranco tesacima; verificare in ogni caso che con il bozzello a cricco (F) in posizione APERTO, il circuito sia libero di poter ruotare in entrambe le direzioni. f -6 How to use the endless line kit TAKLE Do not exceed in tensioning the endless line tackle; always make sure that when the ratchet block (F) is in the OPEN position, the endless line is free to rotate in both directions. BOZZELLO A RIO SVOLGIMENTO DELLA VELA In fase di svolgimento della vela verificare sempre, prima di iniziare a tirare la scotta, che il bozzello a cricco (F) sia in posizione APERTO. Dopo aver posizionato la levetta rossa (H) in posizione APERTO verificare, muovendo la cima in entrambe le direzioni, che il bozzello abbia effettivamente sganciato il freno della puleggia. Agevolare lo svolgimento iniziale, soprattutto quando sulla vela si sono avvolti alcuni giri di scotta, aiutando la rotazione del tamburo attraverso la cima a circuito chiuso. RATHET BLOK UNFURLING THE SAIL When unfurling the sail, always check the ratchet block (F) is in the OPEN position before pulling on the sheet. After having positioned the red lever (H) in the OPEN position, verify the block has released the brake by moving the endless line in both directions. Make the initial unfurling operation easier by assisting the drum in its rotation through the endless line. This is most important especially when the sheet is wrapped around the sail. PERIOLO In fase di svolgimento, quando la vela prende vento, la cima a circuito chiuso scorre velocemente; non tentare di frenarla o, in ogni caso, non agire sul circuito sino a che la vela non sia completamente srotolata. DANGER When unfurling, the sail will fill with wind and the endless line will run fast. Do not try and stop it and do not touch the endless line until the sail is completely unfurled. AVVOLGIMENTO DELLA VELA In fase di avvolgimento posizionare la levetta rossa (H) del bozzello a cricco (F) in posizione HIUSO, lasciare abbondantemente la scotta ed agire sul circuito chiuso tirando dal lato nel quale il bozzello (F) consente la rotazione con cricco. La rotazione impressa dal tamburo alla testa girevole attraverso la cima strallo avverrà con un quantificato ritardo. È quindi normale che nei primi giri della cima a circuito chiuso la vela non si avvolga, iniziando l avvolgimento solo dopo che la cima strallo si sarà caricata dei giri necessari, che verranno poi ritrasmessi alla testa per avvolgere la vela. Es: necessari 40 giri di tamburo per avvolgere la vela = 20 giri di precarica (la vela non si avvolge) + 20 giri (per completare l avvolgimento) tot = 40 giri di tamburo per la chiusura della vela. hiuso - Locked h Aperto - Unlocked h f f FURLING THE SAIL IN When furling the sail in, place the red lever (H) on the ratchet block (F) in the LOSED position, release the sheet and pull on the endless line in the direction where the block (F) allows for the rotation with the ratchet engaged. The rotation will be transferred through the textile stay from drum to halyard swivel with a certain delay. Therefore, it is normal that when you start pulling on the endless line, the sail does not furl. The sail will start furling only when the textile stay has received enough torque with the right number of turns transmitted to the head of the system in order to furl the sail. E.g.: if 40 revolutions of the drum are needed in order to furl the sail = 20 revolutions are taken as preload (the sail does not furl) + 20 revolutions (in order to complete the furling operation); total = 40 revolutions of the drum. um_rlg-code_rollgen_it-en_rev
30 ISTRUZIONI DI MONTAGGIO E USO AVVOLGIMENTO DELLA VELA - NORME DI UTILIZZO Per compiere l operazione, lasciare completamente la vela riprendendo la scotta solo dopo che il 50% circa della vela è stata avvolta, per ottimizzare il corretto avvolgimento del tessuto sullo strallo di RollGen. Agire sulla cima a circuito chiuso come precedentemente descritto. Lasciare fileggiare la vela in modo che il bordo d entrata della vela si allontani dallo strallo, avvolgendosi dall alto (penna) verso il basso (mura). Qualora le condizioni non consentano al bordo d entrata di fileggiare lontano dallo strallo di RollGen (es. poco vento o vento apparente troppo in poppa), orzare leggermente per diminuire l angolo ed aumentare il vento apparente al fine di consentire al bordo d entrata di fileggiare lontano dallo strallo di RollGen. HOW TO FURL THE SAIL IN INSTRUTIONS FOR USE In order to carry out the operation, release the sail completely and take charge of the sheet only when 50% of the sail has been furled in. This will help you optimise the correct furling of the sail cloth onto the RollGen stay. Pull on the endless line as mentioned above. Let the sail flap and feather in order to have its luff away from the textile stay and furl from the top (head) to the bottom (tack). Should the conditions not allow the luff to flap and feather away from the stay (e.g. little wind or the apparent wind is too far aft), alter your course closer to the wind to reduce the angle and increase the apparent wind; this will allow the luff to flap and feather away from the textile stay. Avvolgere la vela con un angolo del vento apparente compreso tra gli 80 e i 130 compatibilmente con le condizioni metereologiche per fare in modo che il bordo d entrata della vela resti lontano dallo strallo di RollGen. Non rispettando tale prescrizione, il bordo d entrata della vela potrebbe avvolgersi nella parte inferiore controarrotolandosi e creando problemi nel successivo svolgimento della vela. In tale caso, agire con brevi movimenti alternati sulla scotta e sulla cima a circuito chiuso per svolgere la vela. Furl the sail when the apparent wind angle is between 80 and 130 (compatibly with weather conditions) in order to allow the luff of the sail flap and feather away from the textile stay. If you do not respect this prescription, the lower part of the sail luff may furl in the opposite direction, and this will cause problems the next time you unfurl the sail. Should this happen, pull on the sheet and the endless line with short alternate movements in order to unfurl the sail. I suddetti consigli sono da intendersi esclusivamente come "indicazioni" generali; resta totale responsabilità del omandante in base alla propria esperienza ed in funzione delle condizioni meteo decidere se e quando avvolgere/ aainare la vela e come meglio operare per effettuare le manovre. The recoendations above are to be intended only as general indications ; the responsibility for deciding if and when furling/lowering down the sail and how to carry out operations in the best way possible lies on the boat captain who will decide depending on his own experience and weather conditions. 30 um_rlg-code_rollgen_it-en_rev. 2.0

 è realizzata mediamente con tessuti di nylon leggeri e delicati; si consiglia di tenere RollGen in posizione di lavoro esclusivamente in")

 is generally made with light and delicate nylon cloth; we suggest keeping RollGen armed only in good weather and sea conditions and")
31 ISTRUZIONI DI MONTAGGIO E USO -7 Altri consigli -7 Other suggestions RollGen con la vela avvolta può essere lasciato in posizione di lavoro a prua SOLO in condizioni meteomarine favorevoli. Per navigare con RollGen armato a prua con la vela avvolta in condizioni meteomarine favorevoli, è necessario avvolgere sulla vela alcuni giri di scotta o penzolo per contenere il tessuto arrotolato e con il paranco tesacima in posizione di lavoro con il bozzello in posizione HIUSO. Non rispettando tale prescrizione, la vela potrebbe aprirsi accidentalmente. La vela avvolta su RollGen (spi asietrico, gennaker, MPS) è realizzata mediamente con tessuti di nylon leggeri e delicati; si consiglia di tenere RollGen in posizione di lavoro esclusivamente in condizioni meteomarine ottimali per il tempo necessario. RollGen may be left in a working position with its sail furled ONLY in good weather and sea conditions. In order to sail in good weather and sea conditions with RollGen pre-set on the bow with its sail furled in, you have to wrap either sheet or strop around the sail in order to prevent the cloth from unrolling; moreover the tackle has to be in working position with the ratchet block on LOSED position. If this recoendation is not respected the sail may unfurl accidentally. The sail you furl with RollGen (Asyetric Spinnaker, Gennaker, MPS) is generally made with light and delicate nylon cloth; we suggest keeping RollGen armed only in good weather and sea conditions and just for the time needed. Non lasciare la barca incustodita all ormeggio con la vela avvolta su RollGen armato in posizione di lavoro. Non utilizzare RollGen con la barca all ormeggio in porto poiché si potrebbero creare danni alla vela, alla struttura ed alle imbarcazioni vicine. Inoltre, con l imbarcazione ormeggiata, non si ha la possibilità di eventuali correzioni di rotta (e conseguente modifica dell angolo apparente del vento) utili al corretto avvolgimento della vela (vedi "Avvolgimento della vela - norme di utilizzo"). When the boat is moored, do not leave the system unattended with RollGen in working position and the sail furled. Do not use RollGen when the boat is moored on a dock, because you may damage either sail, structure, or neighbouring boats. Moreover, when the boat is moored, you do not have the possibility of changing direction if needed (and consequently you cannot change the apparent wind angle) in order to furl the sail correctly (see section How to furl the sail - instructions for use above). um_rlg-code_rollgen_it-en_rev

.")
32 ISTRUZIONI DI MONTAGGIO E USO Non tenere a prua drizze a riposo in prossimità dello strallo; queste potrebbero intralciare la rotazione dello strallo di RollGen. Distanza dello strallo di RollGen dallo strallo di prua. È importante che lo strallo di RollGen in posizione di lavoro non appoggi contro lo strallo di prua (es. il Genoa avvolto sullo strallo), anche in fase avvolgimento/ svolgimento con la sua naturale catenaria. La distanza dallo strallo di prua dipende dall altezza dell uscita della drizza e dalla posizione del punto di aggancio del tamburo di RollGen (testa del bompresso). Più queste quote sono alte, più lo strallo di RollGen sarà lontano dallo strallo di prua. È importante effettuare le manovre di svolgimento/avvolgimento in andatura compresa tra 80 e 130 essendo naturalmente agevolati dalla direzione del vento apparente che tende ad allontanare il sistema (strallo + vela) dallo strallo di prua. È pertanto possibile installare RollGen con tali quote molto ridotte (es. sulla prua senza bompresso), avendo l accortezza di avvolgere e svolgere RollGen SOLO in andature nelle quali la naturale pressione del vento lo allontani dallo strallo di prua, evitando dannose sovrapposizioni. Non interporre stroppi o prolunghe tra il cavetto del punto di mura e l angolo della vela o sulla legatura dell angolo di penna, come da istruzioni al cap Il punto di mura della vela deve essere vincolato direttamente al cavetto e la penna direttamente legata alla redancia terminale. Il tamburo deve essere installato di modo che questo non possa ruotare sul suo asse. Installarlo il più basso possibile (testa bompresso) con il grillo a lira in dotazione o con il moschettone fisso a sgancio rapido (optional). Se si desidera interporre una prolunga e/o un moschettone sotto il tamburo, questo deve essere non girevole e di una lunghezza non eccessiva, per evitare il rischio di torsioni. Do not keep halyards near to the textile stay; they may hinder the rotation of RollGen. Distance between RollGen stay and forestay. It is important that when the RollGen stay is in working position it does not touch the forestay (or the Genoa furled around the stay), even when furling and unfurling with its natural sag. The distance from the forestay depends on the height of the halyard exit and on the position of the connection of the RollGen drum (end of the bowsprit). The higher these measures, the longer the distance from the forestay. It is important to carry out the furling/unfurling operation downwind (between 80 and 130 ) as you will be naturally helped by the direction of the apparent wind that keeps the system (stay + sail) off from the forestay. You may therefore install RollGen with very short distances (e.g. on the bow without bowsprit), if you make sure you furl and unfurl RollGen ONLY when the natural pressure of the wind keeps the system away from the forestay, thus preventing dangerous overlaps. Do not interpose strops or extensions either between tack rod and sail tack, or on sail head lashing, as per instructions on hapt The sail tack has to be connected directly to the rod; the head of the sail has to be connected directly to upper thimble. Please, make sure the drum does not rotate on its axis. It has to be fitted as low as possible (bowsprit head) by means of either the bow shackle supplied or a fixed snap shackle (optional). Should you wish to use an extension and/or a snap shackle under the drum, it must be a non-swivel system. Moreover, the device must not have an excessive length in order to avoid possible torsions. SI - YES NO 32 um_rlg-code_rollgen_it-en_rev. 2.0
 alla bugna della vela e la/le scotta/e all'altro capo del penzolo.")
33 ISTRUZIONI DI MONTAGGIO E USO PENZOLO PROLUNGA SOTTA Il penzolo prolunga scotta ha lo scopo di essere avvolto sulla vela per poter contenere al meglio il tessuto e consentire così di sganciare la/le scotta/e. ollegare il penzolo prolunga scotta (opzionale) alla bugna della vela e la/le scotta/e all'altro capo del penzolo. Il penzolo dovrà essere avvolto sulla vela contenendola, consentendo di sganciare così la/le scotta/e prima di riporre il sistema. SHEET STROP The sheet strop is used to be furled around the sail in order to control the cloth better, thus allowing to disconnect the sheet/s. onnect one sheet/s end of the sheet strop (optional) to the sail clew and the two sheets to the other end of the strop. The extension needs to be furled around the sail thus containing it, making it possible to disconnect the sheet/s before stowing the system. um_rlg-code_rollgen_it-en_rev
34 ISTRUZIONI DI MONTAGGIO E USO -8 La corretta lunghezza del bordo d'entrata Su RollGen si possono installare tutti i comuni tipi di vele asietriche che possono essere già esistenti o di nuova costruzione. Tali vele possono essere progettate e costruite indipendentemente dall utilizzo di RollGen, pertanto il bordo d entrata (dalla penna alla mura) può avere lunghezze di progetto differenti in funzione del diverso tipo di vela (es. MPS, Spi asietrico, ecc.) e del diverso utilizzo (es. da regata, da crociera). Mediamente, installando una vela di taglio standard su RollGen, con lo strallo tagliato come da istruzioni, sarà sufficiente bloccare il punto di mura e la penna per ottenere, con RollGen in posizione di lavoro (drizza tesa) un bordo d entrata con una corretta curvatura media (B) indicativamente pari al 3%-5% più lungo della lunghezza tra i punti di mura. Tale percentuale è un'indicazione e dipende dalle specifiche costruttive impostate dal velaio. Se il bordo d entrata della vela esistente dovesse risultare corto (A) (cioè la vela esistente della barca è stata tagliata più piccola) sarà necessario accorciare lo strallo di RollGen portandolo ad una lunghezza inferiore alla lunghezza del bordo d entrata della vela o comunque ad una lunghezza tale da ottenere la corretta regolazione "media" desiderata del bordo d'entrata. In questo caso la testa girevole risulterà più bassa e vi sarà una quantità di drizza libera maggiore. Se la vela dovesse risultare con il bordo d entrata particolarmente lungo () potrebbe essere più difficoltoso avvolgere correttamente la vela. In questo caso, per il corretto avvolgimento, sarà necessario fare in modo che la vela fileggi al vento maggiormente per A b c -8 orrect luff length All coon types of already existing or newly made asyetric sails can be installed on RollGen. These sails can be designed or built independently from the use of RollGen, thus the luff (from head to tack) can have a different design length depending on the type of sail (i.e. MPS, Asyetric Spinnakers, etc.) and purpose (i.e. racing, cruising). On average, if you install a standard cut sail on RollGen, having cut the stay according to the instructions, it will be sufficient to connect tack point and head in order to obtain, with RollGen in working position (taut halyard), a luff length with the correct average curvature (B) approximately 3%-5% longer than the distance between tack points. After having cut the RollGen stay, carefully check that your preexisting sail is approximately 3% to 5% longer than the distance between tack points. If the luff on the existing sail turns out to be short (A) (e.g. the boat s existing sail was cut too small), you will have to cut down the RollGen stay, making it shorter than the length of the sail luff. In any case, stay and luff need to have the right length in order to obtain the correct medium adjustment of the luff. In this case, the halyard swivel will be lower and there will be a bigger quantity of free halyard. Should the sail luff be extremely long (), furling the sail correctly may be quite difficult. In such case, for a correct furling operation, you will have to let the sail flap to the wind in order to keep the luff away from the system. Should the sail be difficult to furl anyway, then it may be particularly big (e.g. asyetric spinnaker with maximum sail area for the boat involved). We therefore 34 um_rlg-code_rollgen_it-en_rev. 2.0
35 ISTRUZIONI DI MONTAGGIO E USO tenere discosto il bordo d entrata. Se nonostante tutto, eseguendo tale operazione non si riesca ancora ad avvolgere la vela in maniera corretta, probabilmente la vela installata su RollGen è particolarmente grande (es. spinnaker asietrico a massime dimensioni per la barca in oggetto). In tal caso, consigliamo di verificare con il proprio velaio la possibilità di modificare la vela riducendo la lunghezza del bordo d entrata. suggest checking with your own sail-maker the possibility of modifying the sail by reducing its luff. ATTENZIONE Verificare sempre che il nodo/moschettone di drizza non arrivi mai a battere a fine corsa (es. contro la puleggia di testa). AUTION Make sure the halyard knot/snap shackle does not hit its stroke end (i.e. against the top pulley). ATTENZIONE La misura corretta della lunghezza di taglio dello strallo è indicata nella tabella del cap Tagliare lo strallo di RollGen diversamente da quanto indicato nella tabella del cap per adattarlo ad una vela (es. bordo di entrata più corto, A) comprometterà l'utilzzo dello strallo con una vela tagliata mediamente corretta per la barca in oggetto (B). Qualora la vela da installare su RollGen debba essere realizzata nuova, è possibile dare alcune indicazioni generali al velaio per ottimizzarne la costruzione fermo restando che su RollGen è possibile installare vele costruite indipendentemente dal loro successivo utilizzo su RollGen. Quelli che seguono sono quindi da intendersi esclusivamente come consigli che il velaio con la propria esperienza potrà meglio valutare. L angolo di rinforzo di penna deve essere il più morbido possibile con rinforzi a scalare e non rigido (es. NON un unico rinforzo interno), al fine di agevolare l avvolgimento della penna attorno allo strallo. L attacco di penna deve essere del tipo ad anello cucito con fettucce con un diametro il più piccolo possibile (compatibilmente con le dimensioni della vela). Sono sconsigliati anelli a pressare. La lunghezza del bordo d entrata della vela potrà essere ricalcolata rispetto al progetto originale della vela, tenendo conto dell ingombro della sola testa e tamburo (vedi tabella tecnica al cap. A-9; quota "B+D" ingombro tamburo, quota "P" ingombro testa). Mediamente, la corretta quantità da detrarre per il calcolo del bordo d entrata della vela da installare su RollGen è di poco inferiore all equivalente detrazione che il velaio applicherebbe per l uso della vela con la classica calza. Per una vela di taglio radiale è ipotizzabile utilizzare per i primi ferzi del bordo d entrata un tessuto leggermente più pesante del resto della vela. Questo poiché i primi giri di tessuto sullo strallo sono quelli che subiscono le maggiori sollecitazioni in fase di avvolgimento. um_rlg-code_rollgen_it-en_rev. 2.0 AUTION The correct measurement for cutting the stay is shown in the table on hapter utting the RollGen stay differently than shown in the table on hapter -2.1 to make it fit a sail (i.e. shorter luff, A) will endanger the use of the stay with a sail cut correctly for the boat (B). Should you need to have a new sail made to fit RollGen, then we may supply the sail-maker with some general indications in order to maximise its construction. Nonetheless, we remind you that RollGen may be fitted with sails built independently from their following use with RollGen. Therefore, the following pieces of information are to be intended as suggestions the sail-maker may evaluate through his experience. The sail head reinforcement angle must not be rigid (e.g. NOT with one single internal reinforcement). It has to be as flexible as possible, with scaling down reinforcements, in order to allow the head to furl easily around the stay. The head connection has to be made by a ring sewn with strops and its diameter has to be as small as possible (compatibly with the dimensions of the sail). We recoend not using swage rings. The luff length may be calculated differently from the original sail plan, taking into account only the dimensions of drum and halyard swivel (please refer to the technical sheet on hapter A-9: measure "B+D" refers to drum dimensions, measure "P" to halyard swivel dimensions). Roughly, the correct measure to be deducted in order to calculate the sail luff is just smaller than the deduction the sail-maker would make when preparing a sail to be fitted with the sock. When making a sail with a radial cut, we suggest using a slightly thicker cloth on the first strips of the luff. In fact, the cloth that is mostly stressed when furling in is the one which is furled first around the stay. 35


36 ISTRUZIONI DI MONTAGGIO E USO Alcuni esempi di applicazione Senza bompresso Some examples of application Without bowsprit on bompresso With bowsprit Testa Head / top 36 um_rlg-code_rollgen_it-en_rev. 2.0
ART. 1254AL155SS CERNIERE PER PORTE A SPINGERE MANO SINISTRA / HINGES FOR LEFT-HAND DOORS
 SCHEDA INSTALLAZIONE / INSTALLATION SHEET ART. 1254AL155DS CERNIERE PER PORTE A SPINGERE MANO DESTRA / HINGES FOR RIGHT-HAND DOORS UPPER HINGE BODY SACCHETTO GRUPPO MOLLA / PLASTIC BAG WITH THE SPRING
Pagina 2 di 9 A - OGGETTO A - OBJECT B - SCOPO B - SCOPE. Instruction Sheet Rev. A
 COMPARTMENT A - OBJECT Wired fuse and relay box for engine compartment (P/N 1745062). Base box supply with sealing and spacer rings assembled whereas cover is in kit into same packaging. Base box have
Modelli:
 USO E MANUTENZIONE Istruzioni di montaggio Edizione/ Edition I-GB Novembre / November 2004 USE AND MAINTENANCE Instruction manual Modelli: - 08-10 - 20 RollGen Avvolgitore per spi asimmetrico Furling system
INSTALLAZIONE INSTALLATION
 INSTALLAZIONE INSTALLATION KIT SOFFIONI MySlim A CONTROSOFFITTO KIT MySlim SHOWER HEADS FOR FALSE CEILING Art. KIT00006 AVVERTENZE: L impianto deve essere effettuato da personale autorizzato, certificato
Configurazione RollGen RollGen Configuration
 USO E MANUTENZIONE Istruzioni di montaggio Edizione/Edition I-GB 2012 Settembre/September USE AND MAINTENANCE Instruction manual RLG EVO 08 10 20 Configurazione RollGen RollGen Configuration + Luff Control
INSTALLATION GUIDE ITA-ENG CATALYZER YAMAHA T-MAX
 INSTALLATION GUIDE ITA-ENG C o d e : Y 1 1 3 C A T w w w. t e r m i g n o n i. c o m Y113CAT L i s ta c o m p o n e n t i P a c k i n g l i s t 2 w w w. t e r m i g n o n i. c o m Y113CAT L i s ta c o
SRT064 BTH SRT051 BTH SRT052 BTH
 KIT FOR TRUCK BRAKE TESTERS SRT051 BTH SRT052 BTH OPERATOR S MANUAL SRT064BTH SRT051BTH SRT052BTH CONTENTS 1. INTRODUCTION...1 2. Description of SRT064BTH Kit...2 3. Description of SRT051BTH Kit...2 4.
IM095.1 ISTRUZIONI DI MONTAGGIO ASSEMBLY DIAGRAM > LINK SYSTEM SOSPESO ED ELEMENTO TERMINALE APERTO > HANGING LINK SYSTEM AND OPEN END ELEMENT
 ISTRUZIONI DI MONTAGGIO > LINK SYSTEM SOSPESO ED ELEMENTO TERMINALE APERTO ASSEMBLY DIAGRAM > HANGING LINK SYSTEM AND OPEN END ELEMENT HANGING LINK SYSTEM AND OPEN END ELEMENT: Identificare la posizione
Istruzioni di montaggio per ECOFLEX KIT Assembling Instructions for ECOFLEX KIT
 Page 1/7 Release 2 ECOFLEX Kit Istruzioni di montaggio per ECOFLEX KIT Assembling Instructions for ECOFLEX KIT Prima di effettuare le varie operazioni procedere nel modo seguente: - Portare la macchina
TEGOLE di ARDESIA CERAMICA CERAMIC SLATE ROOF TILES
 TEGOLE di ARDESIA CERAMICA CERAMIC SLATE ROOF TILES 40x40 A00210 40x40 A00211 40x40 A00213 40x40 A00216 Sezione dei listelli: section of battens schema di montaggio assembly diagramme Taglio di gronda
LA SACRA BIBBIA: OSSIA L'ANTICO E IL NUOVO TESTAMENTO VERSIONE RIVEDUTA BY GIOVANNI LUZZI
 Read Online and Download Ebook LA SACRA BIBBIA: OSSIA L'ANTICO E IL NUOVO TESTAMENTO VERSIONE RIVEDUTA BY GIOVANNI LUZZI DOWNLOAD EBOOK : LA SACRA BIBBIA: OSSIA L'ANTICO E IL NUOVO Click link bellow and
1.6 DOOR PORTA 2190
 1.6 DOOR 2190 1.6 PORTA 2190 cover Coperchio macchina Macchina Frame Telaio Sliding wings Ante scorrevoli The first operation to carry out to install the door on your boat is the frame and the upper crossbar
Replacement of hose carrier chain
 3 1. Bring the boom in horizontal position and make the extension completely retract. 2. Remove the rear panel. 3. Remove the front guard on the boom hood. 4. In case of machine with basket pre-arrangement,
Adattatori Morsa BDMpro
 1 Cosa sono I Nuovi Adattatori per la Morsa BDMpro consentono di utilizzare la morsa per centraline Bosch anche per le centraline Marelli, Siemens e Delphi. Perché utilizzarli I Nuovi Adattatori per la
KIT AMMORTIZZATORE DI STERZO
 KIT AMMORTIZZATORE DI STERZO Codice: KIT032 Marca: BUELL Modello: X1 LIGHTNING MATERIALE CONTENUTO NEL KIT - n 1 Attacco forcella d.54 - n 2 Vite Tcei M5x12 - n 1 Vite in ergal M8x25 - n 2 OR - n 1 Ammortizzatore
LA SACRA BIBBIA: OSSIA L'ANTICO E IL NUOVO TESTAMENTO VERSIONE RIVEDUTA BY GIOVANNI LUZZI
 Read Online and Download Ebook LA SACRA BIBBIA: OSSIA L'ANTICO E IL NUOVO TESTAMENTO VERSIONE RIVEDUTA BY GIOVANNI LUZZI DOWNLOAD EBOOK : LA SACRA BIBBIA: OSSIA L'ANTICO E IL NUOVO Click link bellow and
CAMBIO OLIO TRIAL LATO SINISTRO TRIAL OIL CHANGE LEFT SIDE
 CAMBIO OLIO TRIAL LATO SINISTRO TRIAL OIL CHANGE LEFT SIDE La tabella sottostante indica gli intervalli di cambio olio consigliati. La sostituzione di olio con intervallo di tempo troppo lungo, porta ad
SACE Emax Operazioni preliminari - Preliminary Operations. 2 - Verifica contenuto kit - Kit content verify 1 OK 2 OK
 Doc. N 1SDH001399R0911 - L8926 SACE Emax 2 Piastra sinistra per accessori (MID-SX ) - E1.2 Left Plate For Accesory (MID-SX ) - E1.2 Linke Platte für Zubehör (MID-SX ) - E1.2 Plaque gauche pour les accessoires
I CAMBIAMENTI PROTOTESTO-METATESTO, UN MODELLO CON ESEMPI BASATI SULLA TRADUZIONE DELLA BIBBIA (ITALIAN EDITION) BY BRUNO OSIMO
 BY BRUNO OSIMO") I CAMBIAMENTI PROTOTESTO-METATESTO, UN MODELLO CON ESEMPI BASATI SULLA TRADUZIONE DELLA BIBBIA (ITALIAN EDITION) BY BRUNO OSIMO READ ONLINE AND DOWNLOAD EBOOK : I CAMBIAMENTI PROTOTESTO-METATESTO, UN MODELLO
I CAMBIAMENTI PROTOTESTO-METATESTO, UN MODELLO CON ESEMPI BASATI SULLA TRADUZIONE DELLA BIBBIA (ITALIAN EDITION) BY BRUNO OSIMO READ ONLINE AND DOWNLOAD EBOOK : I CAMBIAMENTI PROTOTESTO-METATESTO, UN MODELLO
INSTALLAZIONE KIT DOSATORE DI DETERGENTE DETERGENT DISPENSER KIT INSTALLATION
 INSTALLAZIONE KIT DOSATORE DI DETERGENTE DETERGENT DISPENSER KIT INSTALLATION ATTENZIONE PERICOLO TUTTE LE OPERAZIONI DESCRITTE DI SEGUITO DEVONO ESSERE ESEGUITE DA PERSONALE QUALIFICATO E ADDESTRATO WARNING
sensori per cilindri magnetic sensors for cylinders
 Schema di collegamento: fili Wiring diagram: wires Modello Model RS1-A RS-A RS5-C RS-A RS-A Funzione Function Reed NC Reed NC Numero fili Number of wires Lunghezza cavo Lenght of wires Connettore Connector
Technical Guidelines GON % Italian production. sports car oriented
 The rubber nozzle mod GON (Gas Oval Nozzle) has the intake with 210 mm x 105 mm dimensions and has been developed by WORKY in order to be more SPORTS CAR oriented. It has been studied for vehicles with
Istruzioni di montaggio per l ECOFLEX KIT Assembling Instructions for ECOFLEX KIT
 Page 1/7 Release 4 ECOFLEX SYSTEM Istruzioni di montaggio per l ECOFLEX KIT Assembling Instructions for ECOFLEX KIT Prima di effettuare le varie operazioni procedere nel modo seguente: - Portare la macchina
Downloading and Installing Software Socio TIS
 Object: Downloading and Installing Software Socio TIS compiler: L.D. Date Revision Note April 17 th 2013 --- For SO XP; Win 7 / Vista step Operation: Image A1 Open RUN by clicking the Start button, and
SCHEMA DI MONTAGGIO CREDENZA SEQUENCE ASSEMBLING SHEET SIDEBOARD SEQUENCE
 SCHEMA DI MONTAGGIO CREDENZA SEQUENCE ASSEMBLING SHEET SIDEBOARD SEQUENCE 1/9 LA CREDENZA VERRA' SPEDITA AL CLIENTE CON PIEDI, RIPIANI INTERNI E ANTE SMONTATI (vedi Immagine 1). SI DOVRA' QUINDI PROCEDERE
IL GIOVANE HOLDEN FRANNY E ZOOEY NOVE RACCONTI ALZATE LARCHITRAVE CARPENTIERI E SEYMOUR INTRODUZIONE BY JD SALINGER
 IL GIOVANE HOLDEN FRANNY E ZOOEY NOVE RACCONTI ALZATE LARCHITRAVE CARPENTIERI E SEYMOUR INTRODUZIONE BY JD SALINGER READ ONLINE AND DOWNLOAD EBOOK : IL GIOVANE HOLDEN FRANNY E ZOOEY NOVE RACCONTI ALZATE
REGISTRATION GUIDE TO RESHELL SOFTWARE
 REGISTRATION GUIDE TO RESHELL SOFTWARE INDEX: 1. GENERAL INFORMATION 2. REGISTRATION GUIDE 1. GENERAL INFORMATION This guide contains the correct procedure for entering the software page http://software.roenest.com/
ASSEMBLY D. Phone: , Fax: , Address: Via Goldoni 37, Trezzano S/N 20090, Milano, Italy
 ASSEMBLY D 2009 Phone: ++39-0248464552, Fax: ++39-0248464544, E-mail: ultra@ultrapompe.it, Address: Via Goldoni 37, Trezzano S/N 20090, Milano, Italy 01 Preparare un piano di lavoro adatto, in questo caso
Manuale Handbook. Via Torino 16-15020 Piagera di Gabiano (AL) - ITALIA Tel.+ 39 0142 xxxxxx - fax +39 xxxxx. E-mail: support.race@dimsport.
 - ITALIA Tel.+ 39 0142 xxxxxx - fax +39 xxxxx. E-mail: support.race@dimsport.") DIMA 555PRO Manuale Handbook Via Torino 16-15020 Piagera di Gabiano (AL) - ITALIA Tel.+ 39 0142 xxxxxx - fax +39 xxxxx E-mail: supporto.race@dimsport.it E-mail: support.race@dimsport.it http://www.dimsport.it
DIMA 555PRO Manuale Handbook Via Torino 16-15020 Piagera di Gabiano (AL) - ITALIA Tel.+ 39 0142 xxxxxx - fax +39 xxxxx E-mail: supporto.race@dimsport.it E-mail: support.race@dimsport.it http://www.dimsport.it
Heat cost allocators Mounting manual
 - heat cost allocators ripartitori di calore Mounting Manual Manuale di montaggio Heat cost allocators Mounting manual Ripartitori dei costi di calore - Manuale di montaggio pag. 1 Mounting the allocator
NOTE DI ASSEMBLAGGIO ASSEMBLY NOTE pag. 1/5 H131 Honda CB 650 F 2014 KIT
 NOTE DI ASSEMBLAGGIO ASSEMBLY NOTE pag. 1/5 ATTENZIONE: Questo impianto di scarico, codice: H131090IV / H131090TV, è omologato per l utilizzo stradale SOLAMENTE con l istallazione del catalizzatore codice:
NATIONAL SPORT SCHOOL
 NATIONAL SPORT SCHOOL Mark HALF-YEARLY EXAMINATION 2016 Level 4-6 FORM 1 ITALIAN TIME: 30 minutes LISTENING COMPREHENSION TEST (20 punti) Teacher s Paper Please first read the instructions carefully by
ACTUATOR FOR MIXING VALVES
 Description The actuator M03 is used for the motorised command and can be applied on all the models of arberi s three or four way mixing valves (except flanged valves). The rotation angle is limited to
CERNIERE REGOLABILI ADJUSTABLE HINGES
 CERNIERE REGOLABILI ADJUSTABLE HINGES OL CERNIERA SFILABILE REGOLABILE E REVERSIBILE CON PREMONTAGGIO mm1x5 REMOVABLE ADJUSTABLE AND REVERSIBLE HINGE WITH PREASSEMBLY mm1x5 CON ANGOLI ARROTONDATI RAGGIO
ASSEMBLING INSTRUCTION LICENSE PLATE HOLDER CBR 1000 RR 2010
 ASSEMBLING INSTRUCTION LICENSE PLATE HOLDER CBR 1000 RR 2010 IT- Prima di procedere alla seguente descrizione di montaggio, Evotech specifica che declina all utente le responsabilità dovute ad un non corretto
CUSCINETTI A RULLINI NEEDLE ROLLER BEARINGS
 CUSCINETTI A RULLINI NEELE ROLLER BEARINGS Cuscinetti a rullini Needle roller bearings I cuscinetti a rullini NBS sono composti da corpi volventi di forma cilindrica, ed anello esterno e/o interno hanno
Expansion card. EXP-D8-120 I/O Interface Card 8 AC Opto-coupled Digital Inputs 8 DC Digital Outputs
 Expansion card EXP-D8-120 I/O Interface Card 8 AC Opto-coupled Inputs 8 DC Outputs Sommario / Contents Vi ringraziamo per avere scelto questo prodotto Gefran-Siei. Saremo lieti di ricevere all'indirizzo
LA SACRA BIBBIA: OSSIA L'ANTICO E IL NUOVO TESTAMENTO VERSIONE RIVEDUTA BY GIOVANNI LUZZI
 Read Online and Download Ebook LA SACRA BIBBIA: OSSIA L'ANTICO E IL NUOVO TESTAMENTO VERSIONE RIVEDUTA BY GIOVANNI LUZZI DOWNLOAD EBOOK : LA SACRA BIBBIA: OSSIA L'ANTICO E IL NUOVO Click link bellow and
3-Facet prism module
 Foglio di Istruzioni Owner s Manual 3-Facet prism module GR0638 GR0638 Rev. 0 03 Dic 2002 INDICE 1.0 CONTENUTO DELL IMBALLAGGIO 3 2.0 SICUREZZA 3 3.0 INSTALLAZIONE 3 3.1 Montaggio sul proiettore 3 4.0
Info Tecniche Technical Info. Esempi di montaggio Assembling examples
 08 Info Tecniche Esempi di montaggio Assembling examples 08 Nota: Qui di seguito vengono riportati alcuni schemi tipici di collegamento in corrente costante e in tensione costante per LED e Strip. Eseguire
CEDMEGA Rev 1.2 CONNECTION TUTORIAL
 CEDMEGA Rev 1.2 CONNECTION TUTORIAL rev. 1.0 19/11/2015 1 www.cedelettronica.com Indice Power supply [Alimentazione]... 3 Programming [Programmazione]... 5 SD card insertion [Inserimento SD card]... 7
sensori per cilindri magnetic sensors for cylinders Schema di collegamento: 2 fili Wiring diagram: 2 wires RS2-A RS1-A RS3-A RS4-A RS5-C Modello Model
 Schema di collegamento: fili Wiring diagram: wires Modello Model RS1-A RS-A RS5-C RS-A RS4-A Funzione Function Reed NC Reed NC Numero fili Number of wires Lunghezza cavo Length of wires Connettore Connector
Hoods and housings single locking system Custodie con sistema di chiusura a leva singola STD STD-HV 21.00
 Hoods and housings single locking system Custodie con sistema di chiusura a leva singola ST ST-HV 21.00 Surface and bulkhead housings with automatic cover Custodie da parete e da incasso con coperchio
Prefiltri Prefilter ISTRUZIONI PER L USO OPERATING INSTRUCTIONS
 Prefiltri Prefilter PF ISTRUZIONI PER L USO OPERATING INSTRUCTIONS 1.Componenti 1.Components DESCRIZIONE DESCRIPTION 1 Semi guscio inferiore Bottom spherical shell flange 2 Cestello Basket 3 Guarnizione
CCTV DIVISION. Guida Alla Lettura del Numero Seriale, Codice Prodotto, Versione Firmware, Versione Software, Codice Libretto
 CCTV DIVISION Guida Alla Lettura del Numero Seriale, Codice Prodotto, Versione Firmware, Versione Software, Codice Libretto How to Get Serial Number, Firmware Version, Product Code, Software Version, User
MANUALE DI ISTRUZIONI MOVIMENTO CALIBRO 5030D. Cronografo a quarzo con 2 pulsanti
 Calibro 50D IT. 1 MANUALE DI ISTRUZIONI MOVIMENTO CALIBRO 50D Cronografo a quarzo con pulsanti Descrizione degli strumenti d indicazione e d uso Strumenti d indicazione Strumenti d uso Lancetta dei minuti
KIT AMMORTIZZATORE STERZO
 N. DI MATRICOLA/SERIAL N. KIT 024 DA INDICARE IN CASO DI RECLAMO/ TO BE MENTIONATED IN CASE OF CLAIM KIT AMMORTIZZATORE STERZO Tutte le operazioni di smontaggio e montaggio contenute in questo manuale
REGISTRATION. Area Ricerca
 REGISTRATION Note: former students can skip the registration process and log in using their account (id123456) 1.1 HOW TO REGISTER: please, go to web page www.univr.it/applicationphd and select the item
Lanterne monoblocco Alta Gamma High size, one-piece bellhousings. Componenti - Components 04
 Lanterne monoblocco Alta Gamma High size, one-piece bellhousings Componenti - Components 04 Con il fine di migliorare costantemente la qualità dei nostri prodotti, ci riserviamo il diritto di modificarne
IM043.3 ISTRUZIONI DI MONTAGGIO ASSEMBLY DIAGRAM CABINE ARMADIO MONOPOLI
 ISTRUZIONI DI MONTAGGIO CABINE ARMADIO MONOPOLI > SCHEMA SEQUENZA DI MONTAGGIO Pag. 1 > STRUTTURA Pag. 2 > RIPIANI Pag. 5 > ANTE Pag. 6 ASSEMBLY DIAGRAM MONOPOLI WALK IN CLOSET > ASSEMBLY DIAGRAM Pag.
ANELLI V-RING V-RING SEALS
 ANELLI V-RING V-RING SEALS CATALOGO TECNICO GENERALE GENERAL TECHNICAL CATALOGUE..0 OIL SEALS INDICE INDEX PROFILO PROFIL TIPO TYPE MATERIALE MATERIAL TEMPERATURA C TEMPERATURE C DIAMETRO ALBERO SHAFT
Image distorsion wheels
 ORDER DIRECTLY TODAY AT: www.bulbamerica.com or CALL TOLL FREE 888-505-2111 Foglio di Istruzioni Owner s Manual Image distorsion wheels GR0640 GR0640 Rev. 0 10 Dic 2002 ORDER DIRECTLY TODAY AT: www.bulbamerica.com
MANUALE MONTAGGIO MOTORI SERIE VEGL MOTOR ASSEMBLY MANUAL VEGL SERIES
 MOTORI A CORRENTE CONTINUA GLEICHSTROMMOTOREN D.C. MOTORS S.r.l. Cap.Soc. 100.000 i.v. 36050 MONTORSO V. (VI) Italy REA 113113 Via Valchiampo, 14 Reg.imprese n.00170250245 tel. 0039 444 685505 r.a. Cod.Fisc.
MANUALE DI ISTRUZIONI MOVIMENTO VD51 Cronografo con secondi e minuti
 MANUALE DI ISTRUZIONI MOVIMENTO VD51 Cronografo con secondi e minuti FUNZIONAMENTO VD51 DISPLAY E PULSANTI DELLA CORONA Lancetta minuti Lancetta ore Lancetta secondi Lancetta minuti cronometro Lancetta
UNIVERSITÀ DEGLI STUDI DI TORINO
 STEP BY STEP INSTRUCTIONS FOR COMPLETING THE ONLINE APPLICATION FORM Enter the Unito homepage www.unito.it and click on Login on the right side of the page. - Tel. +39 011 6704425 - e-mail internationalexchange@unito.it
CERNIERE REGOLABILI ADJUSTABLE HINGES
 CERNIERE REGOLABILI ADJUSTABLE HINGES 9 OL 14,8 OLV 0,16 OBV 0,16 OBG 0,16 BRY 0,16 OCR 6,60 CRS 6,60 CERNIERA SFILABILE REGOLABILE E REVERSIBILE CON PREMONTAGGIO 01 OTTONE LUCIDO NON 9 P OLV,40 OBV,96
A. T. S. ( Air Track Supply ) ALIMENTAZIONE con IMPIANTO SCORREVOLE
 ALIMENTAZIONE con IMPIANTO SCORREVOLE") Cod: 993.001.000 Rev: 01 Giugno 2006 ITALIANO / ENGLISH A. T. S. ( Air Track Supply ) ALIMENTAZIONE con IMPIANTO SCORREVOLE VERSIONE STANDARD ISTRUZIONI DI MONTAGGIO PARTI DI RICAMBIO STANDARD VERSION
Cod: 993.001.000 Rev: 01 Giugno 2006 ITALIANO / ENGLISH A. T. S. ( Air Track Supply ) ALIMENTAZIONE con IMPIANTO SCORREVOLE VERSIONE STANDARD ISTRUZIONI DI MONTAGGIO PARTI DI RICAMBIO STANDARD VERSION
Incassi Istruzioni di installazione / Installation instruction
 Incassi Istruzioni di installazione / Installation instruction Art. 884054 Art. 884053 Art. 654099 Art. 654100 Art. 035212 Per installatore: Al fine di garantire la durata del prodotto installare rubinetti
Libretto uso e manutenzione. Owner s handbook. rev /07
 Libretto uso e manutenzione Owner s handbook Elenco componenti List of components ALBERTO SASSI S.p.A. www.sassi.it 2 ALBERTO SASSI S.p.A. www.sassi.it 3 ALBERTO SASSI S.p.A. www.sassi.it 4 Tabella riferimento
MACCHINE PER LA LAVORAZIONE DEL LEGNO WOODWORKING MACHINERY MANUALE RICAMBI E SCHEMI / SPARE PARTE MANUAL AND DIAGRAMS
 MACCHINE PER LA LAVORAZIONE DEL LEGNO WOODWORKING MACHINERY MANUALE RICAMBI E SCHEMI / SPARE PARTE MANUAL AND DIAGRAMS QUESTO LIBRETTO E DA CONSERVARE PER FUTURI RIFERIMENTI E DOVRA SEMPRE SEGUIRE LA MACCHINA
BDMPro Positioning Frame
 1 2 Di cosa si tratta La Morsa per BDMpro è uno strumento studiato per agevolare la lettura e la programmazione delle centraline con BDMpro. Vantaggi Grazie alla Morsa per BDMpro è possibile effettuare
LA SACRA BIBBIA: OSSIA L'ANTICO E IL NUOVO TESTAMENTO VERSIONE RIVEDUTA BY GIOVANNI LUZZI
 Read Online and Download Ebook LA SACRA BIBBIA: OSSIA L'ANTICO E IL NUOVO TESTAMENTO VERSIONE RIVEDUTA BY GIOVANNI LUZZI DOWNLOAD EBOOK : LA SACRA BIBBIA: OSSIA L'ANTICO E IL NUOVO Click link bellow and
Quando mi collego ad alcuni servizi hosting ricevo un messaggio relativo al certificato di protezione del sito SSL, come mai?
 IT FAQ-SSL Quando mi collego ad alcuni servizi hosting ricevo un messaggio relativo al certificato di protezione del sito SSL, come mai? Il certificato SSL relativo ai servizi hosting è stato rinnovato
Incassi Istruzioni di installazione / Installation instruction
 Incassi Istruzioni di installazione / Installation instruction Art. 914016 (2OUT) Art. 034127 (3OUT) Art. 034128 (4OUT) Per installatore: Al fine di garantire la durata del prodotto installare rubinetti
 MANUALE UTENTE MODULO ESPANSIONE TASTI MANUALE UTENTE MANUALE UTENTE Descrizione Il modulo fornisce al telefono VOIspeed V-605 flessibilità e adattabilità, mediante l aggiunta di trenta tasti memoria facilmente
SACE Emax 2. 1 - Operazioni preliminari - Preliminary Operations. 2 - Verifica contenuto kit - Kit content verify C X8 B D X4.
 Doc. N 1SDH001399R0932 - L9679 SAE Emax 2 Guide Laterali Parte Mobile - E1.2 Lateral Guides Moving Part - E1.2 Seitenbleche - E1.2 Plaques Laterales - E1.2 Laterales - E1.2 1 - Operazioni preliminari -
sottobasi per valvole a spola
 sottobasi per valvole a spola manifolds for spool valves Sottobasi modulari per valvole a spola /8 e /4 Multiple sub-bases for /8 and /4 spool valves Sottobasi a posti fissi per valvole a spola /8 e /4
SACE Emax 2. 1 - Operazioni preliminari - Preliminary Operations. 2 - Verifica contenuto kit - Kit content verify 1 OK 2 OK
 Doc. N SDH00400R0905 - L9679 SACE Emax 2 Trip Coil - E2.2-E4.2-E6.2 - Operazioni preliminari - Preliminary Operations - Leggere attentamente il documento RH000003 prima di procedere - Assicurarsi che l
UT / RT 1306_C.doc 26/08/04. Pagina 1/8
 INVERSIONE SENSO DI ROTAZIONE HOW TO CHANGE THE SENSE OF ROTATION SENSO DI ROTAZIONE Il senso di rotazione di una pompa monodirezionale è definito nel seguente modo: guardando la porta frontalmente con
/ PA887/ sostituita dalla nuova / PA1083/ / PA887/ replaced by new / PA1083/
 24-0887/ PA887/ 10887 sostituita dalla nuova 24-1083/ PA1083/ 101083 24-0887/ PA887/ 10887 replaced by new 24-1083/ PA1083/ 101083 24-0887/ PA887/ 10887 Adattabile OES/ Suitable for OES Fiat/Lancia/Opel/Suzuki:
Scheda Allarmi Alarm Board MiniHi
 Scheda Allarmi Alarm Board MiniHi Manuale Utente User Manual Italiano English cod. 272680 - rev. 18/04/02 ITALIANO INDIE 1. INTRODUZIONE...2 2. RIONOSIMENTO DEI LIVELLI DI TENSIONE DEL SEGNALE 0-10 VOLT...2
Centrale MK3 MK3 power packs
 Centrale power packs Manuale di regolazione Adjusting manual - Installare la centrale sulla rampa e collegare i raccordi idraulici A e B come nell immagine sottostante. - Instal the power pack on the dock
UNIVERSITÀ DEGLI STUDI DI TORINO
 How to register online for exams (Appelli) Version updated on 18/11/2016 The academic programs and the career plan Incoming students can take exams related to the courses offered by the Department where
FLOW REGULATORS USER S MANUAL MANUALE D USO. SITECNA SRL Via G. Di Vittorio Peschiera Borromeo Milan Italy
 R FLOW REGULATORS USER S MANUAL MANUALE D USO Max 12 bar SEALS FL FK LT NB RFU04NSS II2GD c IICT6X SITECNA SRL Via G. Di Vittorio 22 20068 Peschiera Borromeo Milan Italy USER'S MANUAL MANUALE D USO CONTENTS
SEMPLICE LED. // Schemi cablaggio // Wiring diagrams. // Istruzioni per il montaggio // Assembly instructions
 // Schemi cablaggio // Wiring diagrams SEMPICE ED // Istruzioni per il montaggio // Assembly instructions // Avvertenze. a sicurezza dell apparecchio è garantita solamente con l uso appropriato delle presenti
Measurement. Picture 1. Picture 2
 Measurement Measurement Picture 1 La misura viene effettuata su di un piano in legno di forma quadrata con lato di 1400 mm. Si identificano N 9 referenze di misura, Mark, per ognuno dei quali vengono misurati
ROBOTIZED PACKAGING SYSTEMS
 WE TAKE CARE OF YOUR SECONDARY PACKAGING ROBOTIZED PACKAGING SYSTEMS LA NOSTRA AZIENDA Twinpack progetta, produce e installa macchine per l applicazione di maniglie, fasce adesive per multimballi, film
SOSTITUZIONE REPLACEMENT ABBINAMENTO A LEVA CODICE A DX A SX LEVER RETRACTABLE CAM REF. A RX A LX
 PORTE AUTOMATICHE PER ASCENSORI AUTOMATIC DOORS FOR LIFTS SOSTITUZIONE REPLACEMENT ABBINAMENTO A LEVA CODICE A-700-200-510 DX A-700-200-507 SX LEVER RETRACTABLE CAM REF. A-700-200-510 RX A-700-200-507
Esempio con Google Play tore Example with Google Play tore
 Guida all installazione ed uso dell App VR Tour Camerata Picena Per installare l App occorre aprire lo Store del vostro smartphone (Play Store o App Store) e cercare l App con parola chiave Camerata Picena.
CAMBIO OLIO TRIAL LATO DESTRO TRIAL OIL CHANGE RIGHT SIDE
 CAMBIO OLIO TRIAL LATO DESTRO TRIAL OIL CHANGE RIGHT SIDE La tabella sottostante indica gli intervalli di cambio olio consigliati. La sostituzione di olio con intervallo di tempo troppo lungo, portano
ISTRUZIONI PER IL MONTAGGIO DEL KIT SSD INSTRUCTIONS TO INSTALL THE KIT SSD
 Audya Series ISTRUZIONI PER IL MONTAGGIO DEL KIT SSD INSTRUCTIONS TO INSTALL THE KIT SSD ISTRUZIONI PER L APERTURA DI AUDYA (FIG. 1) 1. Svitare le 4 viti poste sul fondo 2. Svitare le 2 viti poste
MANUALE DI ISTRUZIONI PER L INSTALLAZIONE, L USO E LA MANUTENZIONE DI: OVERHAUL HANDBOOK FOR INSTALLATION, USE AND MAINTENANCE OF:
 Sede Operativa: 27020 PARONA (PV) Italy Via Artigianato, 12 Tel. +39 0384 253136 Fax +39 0384 253574 E-mail:info@azzalinsrl.it Web site: www.azzalinsrl.it Sede Legale: 27026 GARLASCO (PV) Vicolo della
PRELIMINARY INFORMATIONS FOR INSTALLATION, USE, WARRANTY AND MAINTENANCE INFORMAZIONI PRELIMINARI PER INSTALLAZIONE, USO, GARANZIA E MANUTENZIONE
 INFORMAZIONI PRELIMINARI PER INSTALLAZIONE, USO, GARANZIA E MANUTENZIONE Limitazioni alla garanzia istruzioni generali PRELIMINARY INFORMATIONS FOR INSTALLATION, USE, WARRANTY AND MAINTENANCE Limitations
MODALITA DI IMPIEGO PD
 MODALITA DI IMPIEGO PD MISURA CONCORDANZA/ 1. Accendere il dispositivo tramite interruttore a slitta situato sul lato destro; 2. All atto dell accensione il dispositivo esegue un test di funzionamento
Serie 200. SERIE 200 Il nuovo pieghevole KIT KIT KIT KIT KIT KIT KIT KIT
 KIT 06-8 KIT 06-8 Sistemi scorrevoli per armadi / Folding systems for furniture 06 06 08 08 KIT 07-8 KIT 07-8 07 07 08 08 KIT 06-267 KIT 06-267 06 06 0267 0267 KIT 07-267 KIT 07-267 07 07 0267 0267 Legenda
TD3.5 (dual displacement / cilindrata doppia) TV3.5 (variable displacement / cilindrata variabile)
 TV3.5 (variable displacement / cilindrata variabile)") TD3.5 (dual displacement / cilindrata doppia) TV3.5 (variable displacement / cilindrata variabile) 600 150 (4) 800 200 (4) 1000 250 (4) 1100 280 (4) 1200 300 (4) Equivalent displacement Cilindrata equivalente
TD3.5 (dual displacement / cilindrata doppia) TV3.5 (variable displacement / cilindrata variabile) 600 150 (4) 800 200 (4) 1000 250 (4) 1100 280 (4) 1200 300 (4) Equivalent displacement Cilindrata equivalente
kit E1= 43,00 mm kit E2= 49,00 mm Eliminated Parts:
 Current: D kit E1= 43,00 mm New: kit E2= 49,00 mm D Eliminated Parts: 2 Spare Parts 3 Backwards compatibility of spare parts Stator Shell Seal Leads/Prong Upper end bell Diaphragm Diaphragm cover Snap
Mandrino automatico porta-pinze da barra Power operated collet chuck for bar machining. Attacco cilindrico - Plain back mounting
 Mandrini porta-pinze da barra serie PPBE Collet chucks for bar machining PPBE series PPBE Mandrino automatico porta-pinze da barra Power operated collet chuck for bar machining Attacco cilindrico - Plain
KIT AMMORTIZZATORE STERZO
 N. DI MATRICOLA / SERIAL N. KIT 140 DA INDICARE IN CASO DI RECLAMO/ TO BE MENTIONATED IN CASE OF CLAME/ KIT AMMORTIZZATORE STERZO Tutte le operazioni di smontaggio e montaggio contenute in questo manuale
ASSEMBLAGGIO ASSEMBLING
 ASSEMBLAGGIO ASSEMBLING DESIGNER CARATTERISTICHE PRINCIPALI PRINCIPAL FEATURES 1) Regolazioni fili continua con accordatore 2) Pattino con ruota 3) Il barramaniglia non esce mai dalle guide 1) Constant
Le piccole cose che fanno dimagrire: Tutte le mosse vincenti per perdere peso senza dieta (Italian Edition)
") Le piccole cose che fanno dimagrire: Tutte le mosse vincenti per perdere peso senza dieta (Italian Edition) Istituto Riza di Medicina Psicosomatica Click here if your download doesn"t start automatically
Le piccole cose che fanno dimagrire: Tutte le mosse vincenti per perdere peso senza dieta (Italian Edition) Istituto Riza di Medicina Psicosomatica Click here if your download doesn"t start automatically
controlli di livello capacitivi capacitive levels controls
 controlli di livello capacitivi capacitive levels controls SENSORI CAPACITIVI ALTA TEMPERATURA SC18M-HT/SC30M-HT HIGH TEMPERATURE CAPACITIVE SENSORS SC18M-HT/SC30M-HT MODELS GENERALITÀ GENERAL DETAILS
Istruzioni per l installazione Installation guide
 & Istruzioni per l installazione Installation guide KETRON X1 & XD9 Istruzioni per l apertura dello strumento Instructions to open the instrument Eseguire le operazioni adagiando lo strumento sopra un
Mod. 1067 INTERFACCIA USB/KEY USB/KEY INTERFACE. Sch./Ref.1067/003
 Mod. 1067 DS1067-019 LBT8388 INTERFACCIA USB/KEY USB/KEY INTERFACE Sch./Ref.1067/003 ITALIANO DESCRIZIONE GENERALE L interfaccia 1067/003 consente di collegare alla Centrale 1067/032 o 1067/042 (ver. 2.00
Magritte. Window covering systems.
 R www.dekoraitalia.it MAGRITTE R Indicazioni per l'ingombro, taglio, assemblaggio Dimensions, cutting and assembling instructions Ingombro guide con telai montati Dimensions of the slide plus frame 3 cm
Fiori di campo. Conoscere, riconoscere e osservare tutte le specie di fiori selvatici più note
 Fiori di campo. Conoscere, riconoscere e osservare tutte le specie di fiori selvatici più note M. Teresa Della Beffa Click here if your download doesn"t start automatically Fiori di campo. Conoscere, riconoscere
Marketing non Convenzionale: Viral, Guerrilla e prospettive future (Italian Edition)
") Marketing non Convenzionale: Viral, Guerrilla e prospettive future (Italian Edition) Luca Taborelli Click here if your download doesn"t start automatically Marketing non Convenzionale: Viral, Guerrilla
Marketing non Convenzionale: Viral, Guerrilla e prospettive future (Italian Edition) Luca Taborelli Click here if your download doesn"t start automatically Marketing non Convenzionale: Viral, Guerrilla
RUBINETTO IN CRISTALLO/TAP SHELF IN GLASS
 Attenzione: l'elemento in cristallo è un prodotto artigianale e le fasi di lavorazione sono eseguite a mano, pertanto le imperfezioni non sono da considerarsi come difetti di produzione, bensì caratteristiche
SPIGOLATORE. Brembana CMS. Industries Tel. +39 0345 64 201 - Fax +39 0345 64 280. www.cms.it. glass technology
 www.cms.it ITA GB F D E CMS Industries 24019 Zogno (Bg) Italy - via A. Locatelli, 49 Tel. +39 0345 64 201 - Fax +39 0345 64 280 www.cms.it Manuale d Installazione Uso e Manutenzione Installation, Operating
TD3.5 (dual displacement / cilindrata doppia) TV3.5 (variable displacement / cilindrata variabile)
 TV3.5 (variable displacement / cilindrata variabile)") TD3.5 (dual displacement / cilindrata doppia) TV3.5 (variable displacement / cilindrata variabile) Equivalent displacement Cilindrata equivalente Bore Alesaggio 600 150 (4) 800 200 (4) 1000 250 (4) 1200
TD3.5 (dual displacement / cilindrata doppia) TV3.5 (variable displacement / cilindrata variabile) Equivalent displacement Cilindrata equivalente Bore Alesaggio 600 150 (4) 800 200 (4) 1000 250 (4) 1200